
How to get better house photos
10 tips for better pictures
Everybody wants their house to sell as quickly as possible, but how can you do that? Well, there’s basically two ways. The first is to price it cheaply, after all it’s easy to sell twenty pounds notes for a tenner! However, the better way is to get your marketing looking the best it possibly can. The most fundamental part of every property listing is the photographs. Both sellers and agents can do a few simple things to get much better photos which will help to entice prospective buyers to come and have a look around.
In this article we’ll tell you our top ten ways to get the best set of house photos you can! All the pictures in this article are photos of houses in Waterlooville, taken by ourselves.
10. show extensions clearly

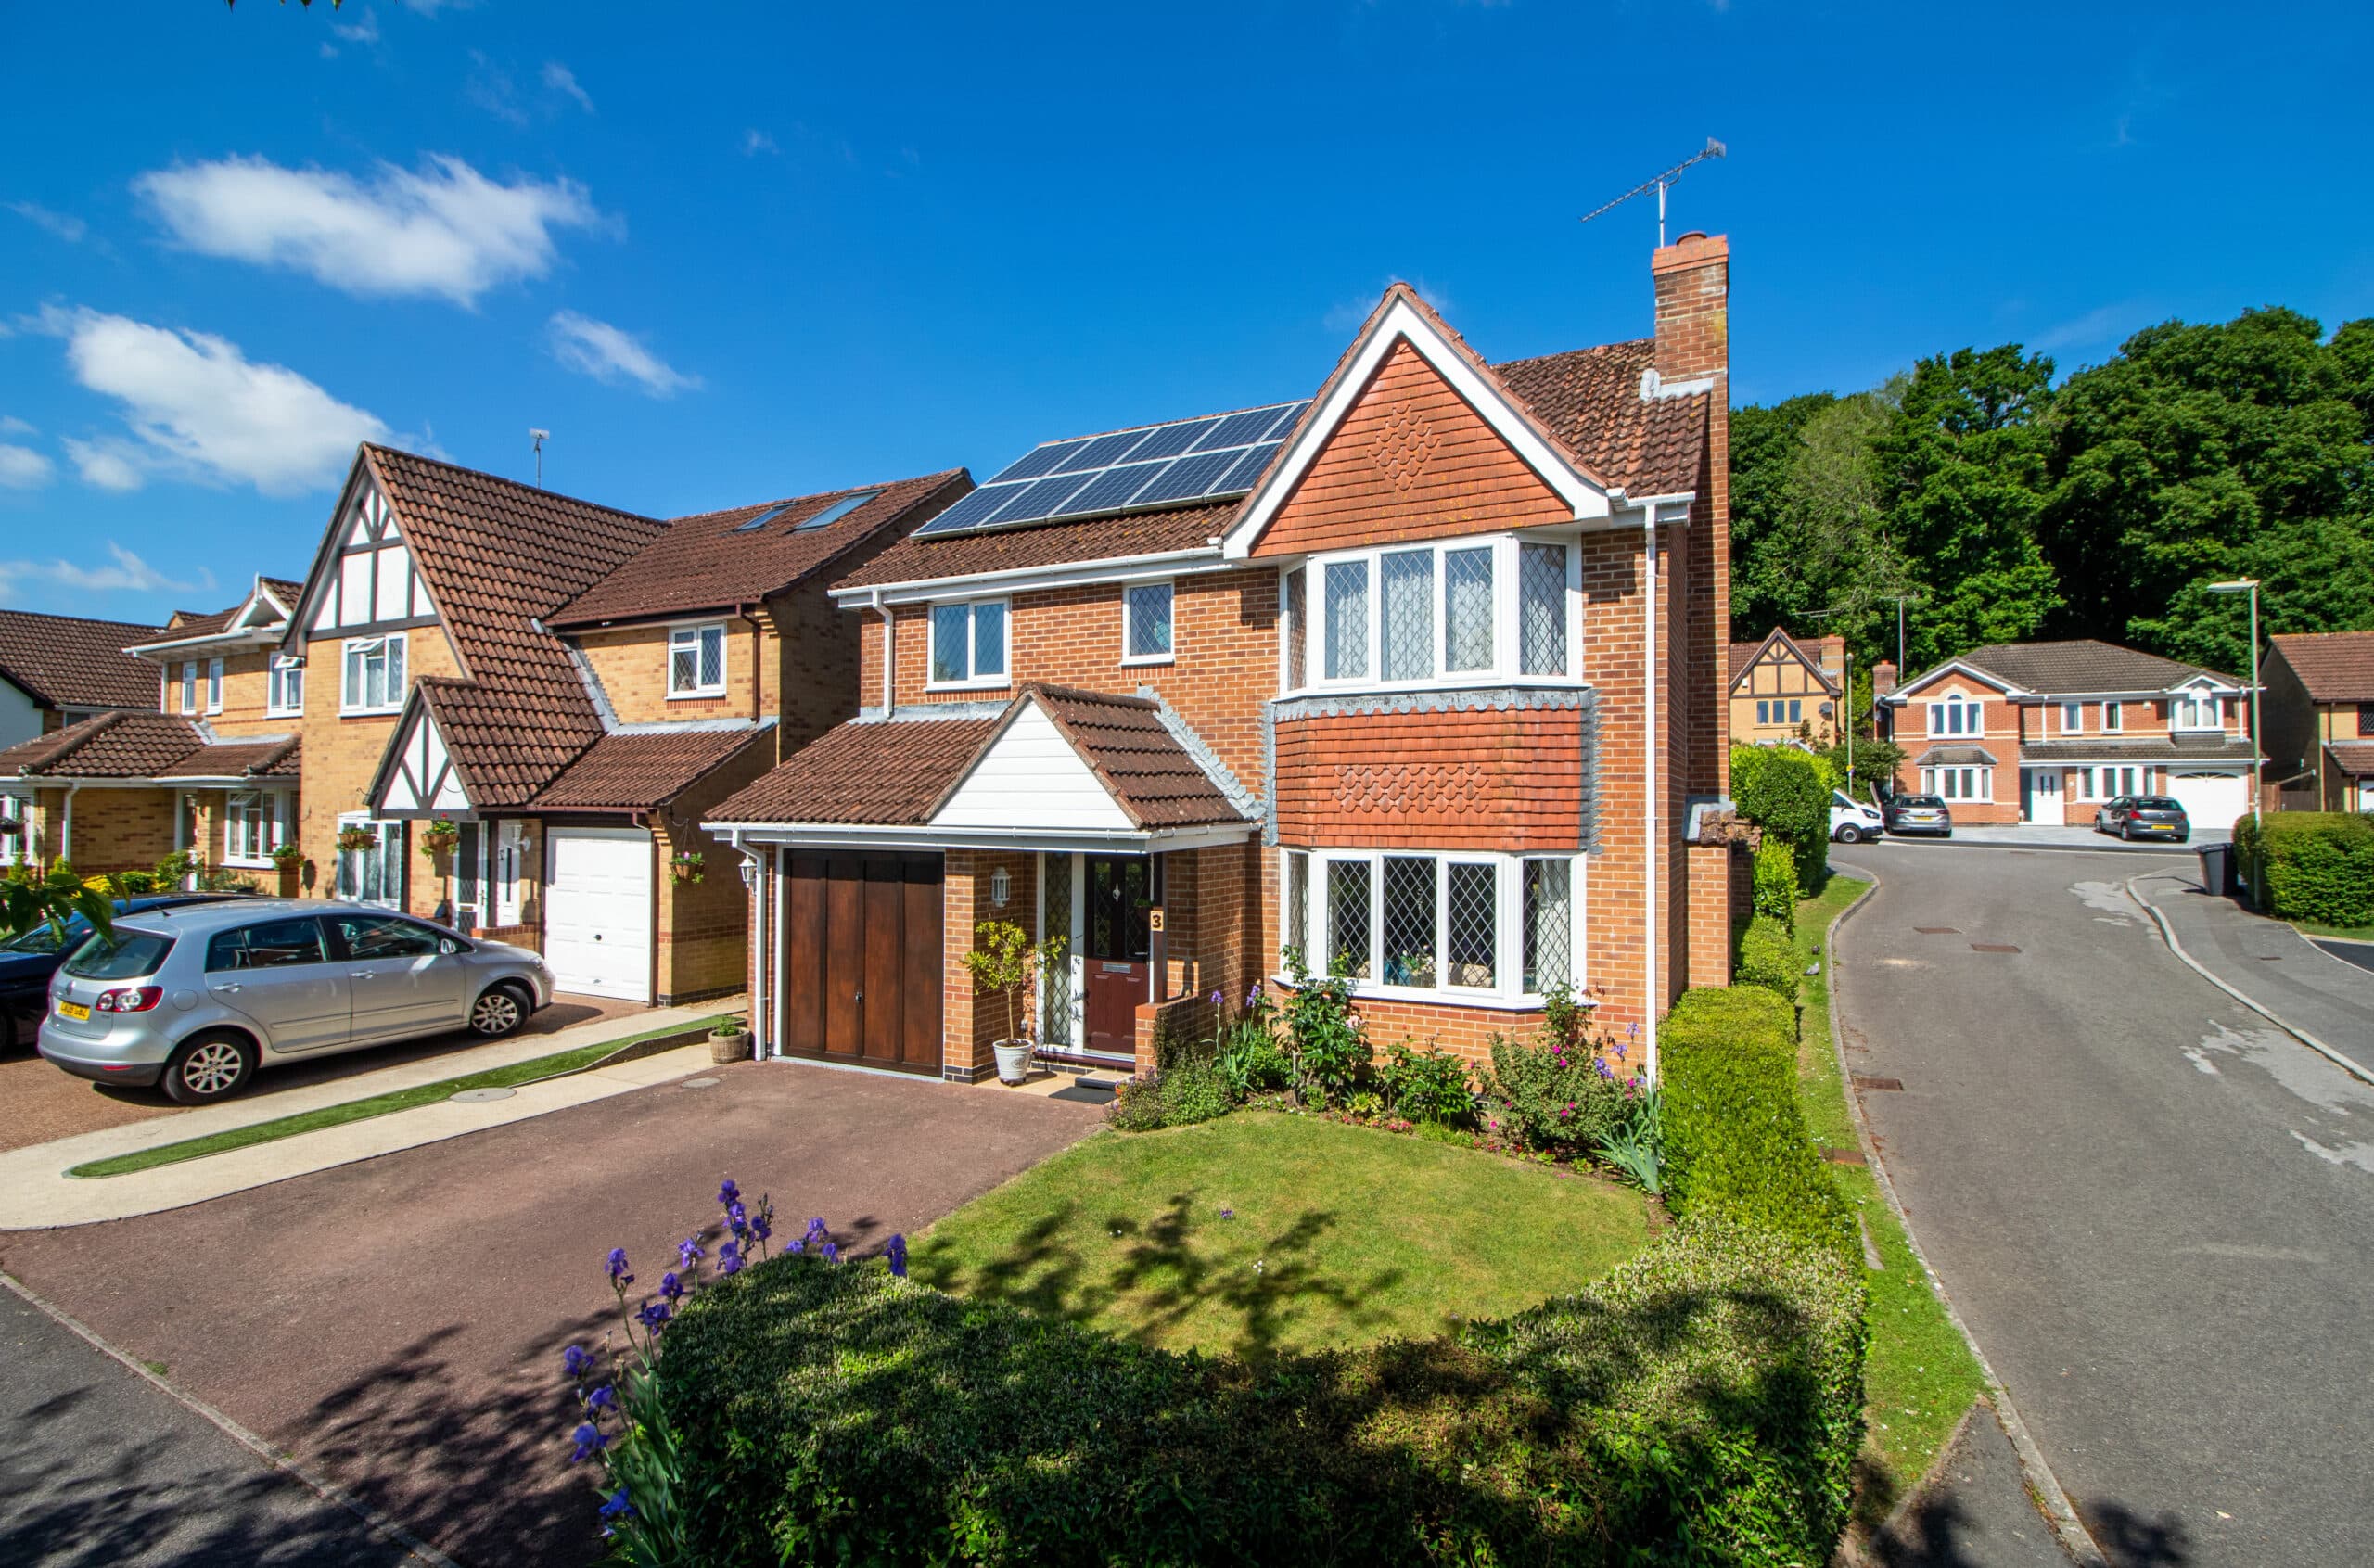
If your house has been extended, you’re probably asking a higher price than other properties in the road. However, from the front photo buyers won’t usually be able to tell if there’s an extension at the back.
We find it amazing how often there isn’t a photo showing the back of the house, when there’s actually a really nice extension! At a quick glance, it’s not always obvious from internal photos and floorplans that an extension has been added. It’s not enough just to put it in the written details. In our experience, it’s often apparent that viewers haven’t read the written details at all! If your house has been extended, be sure to get an external photo where it can be seen clearly.
9. keep those uprights vertical
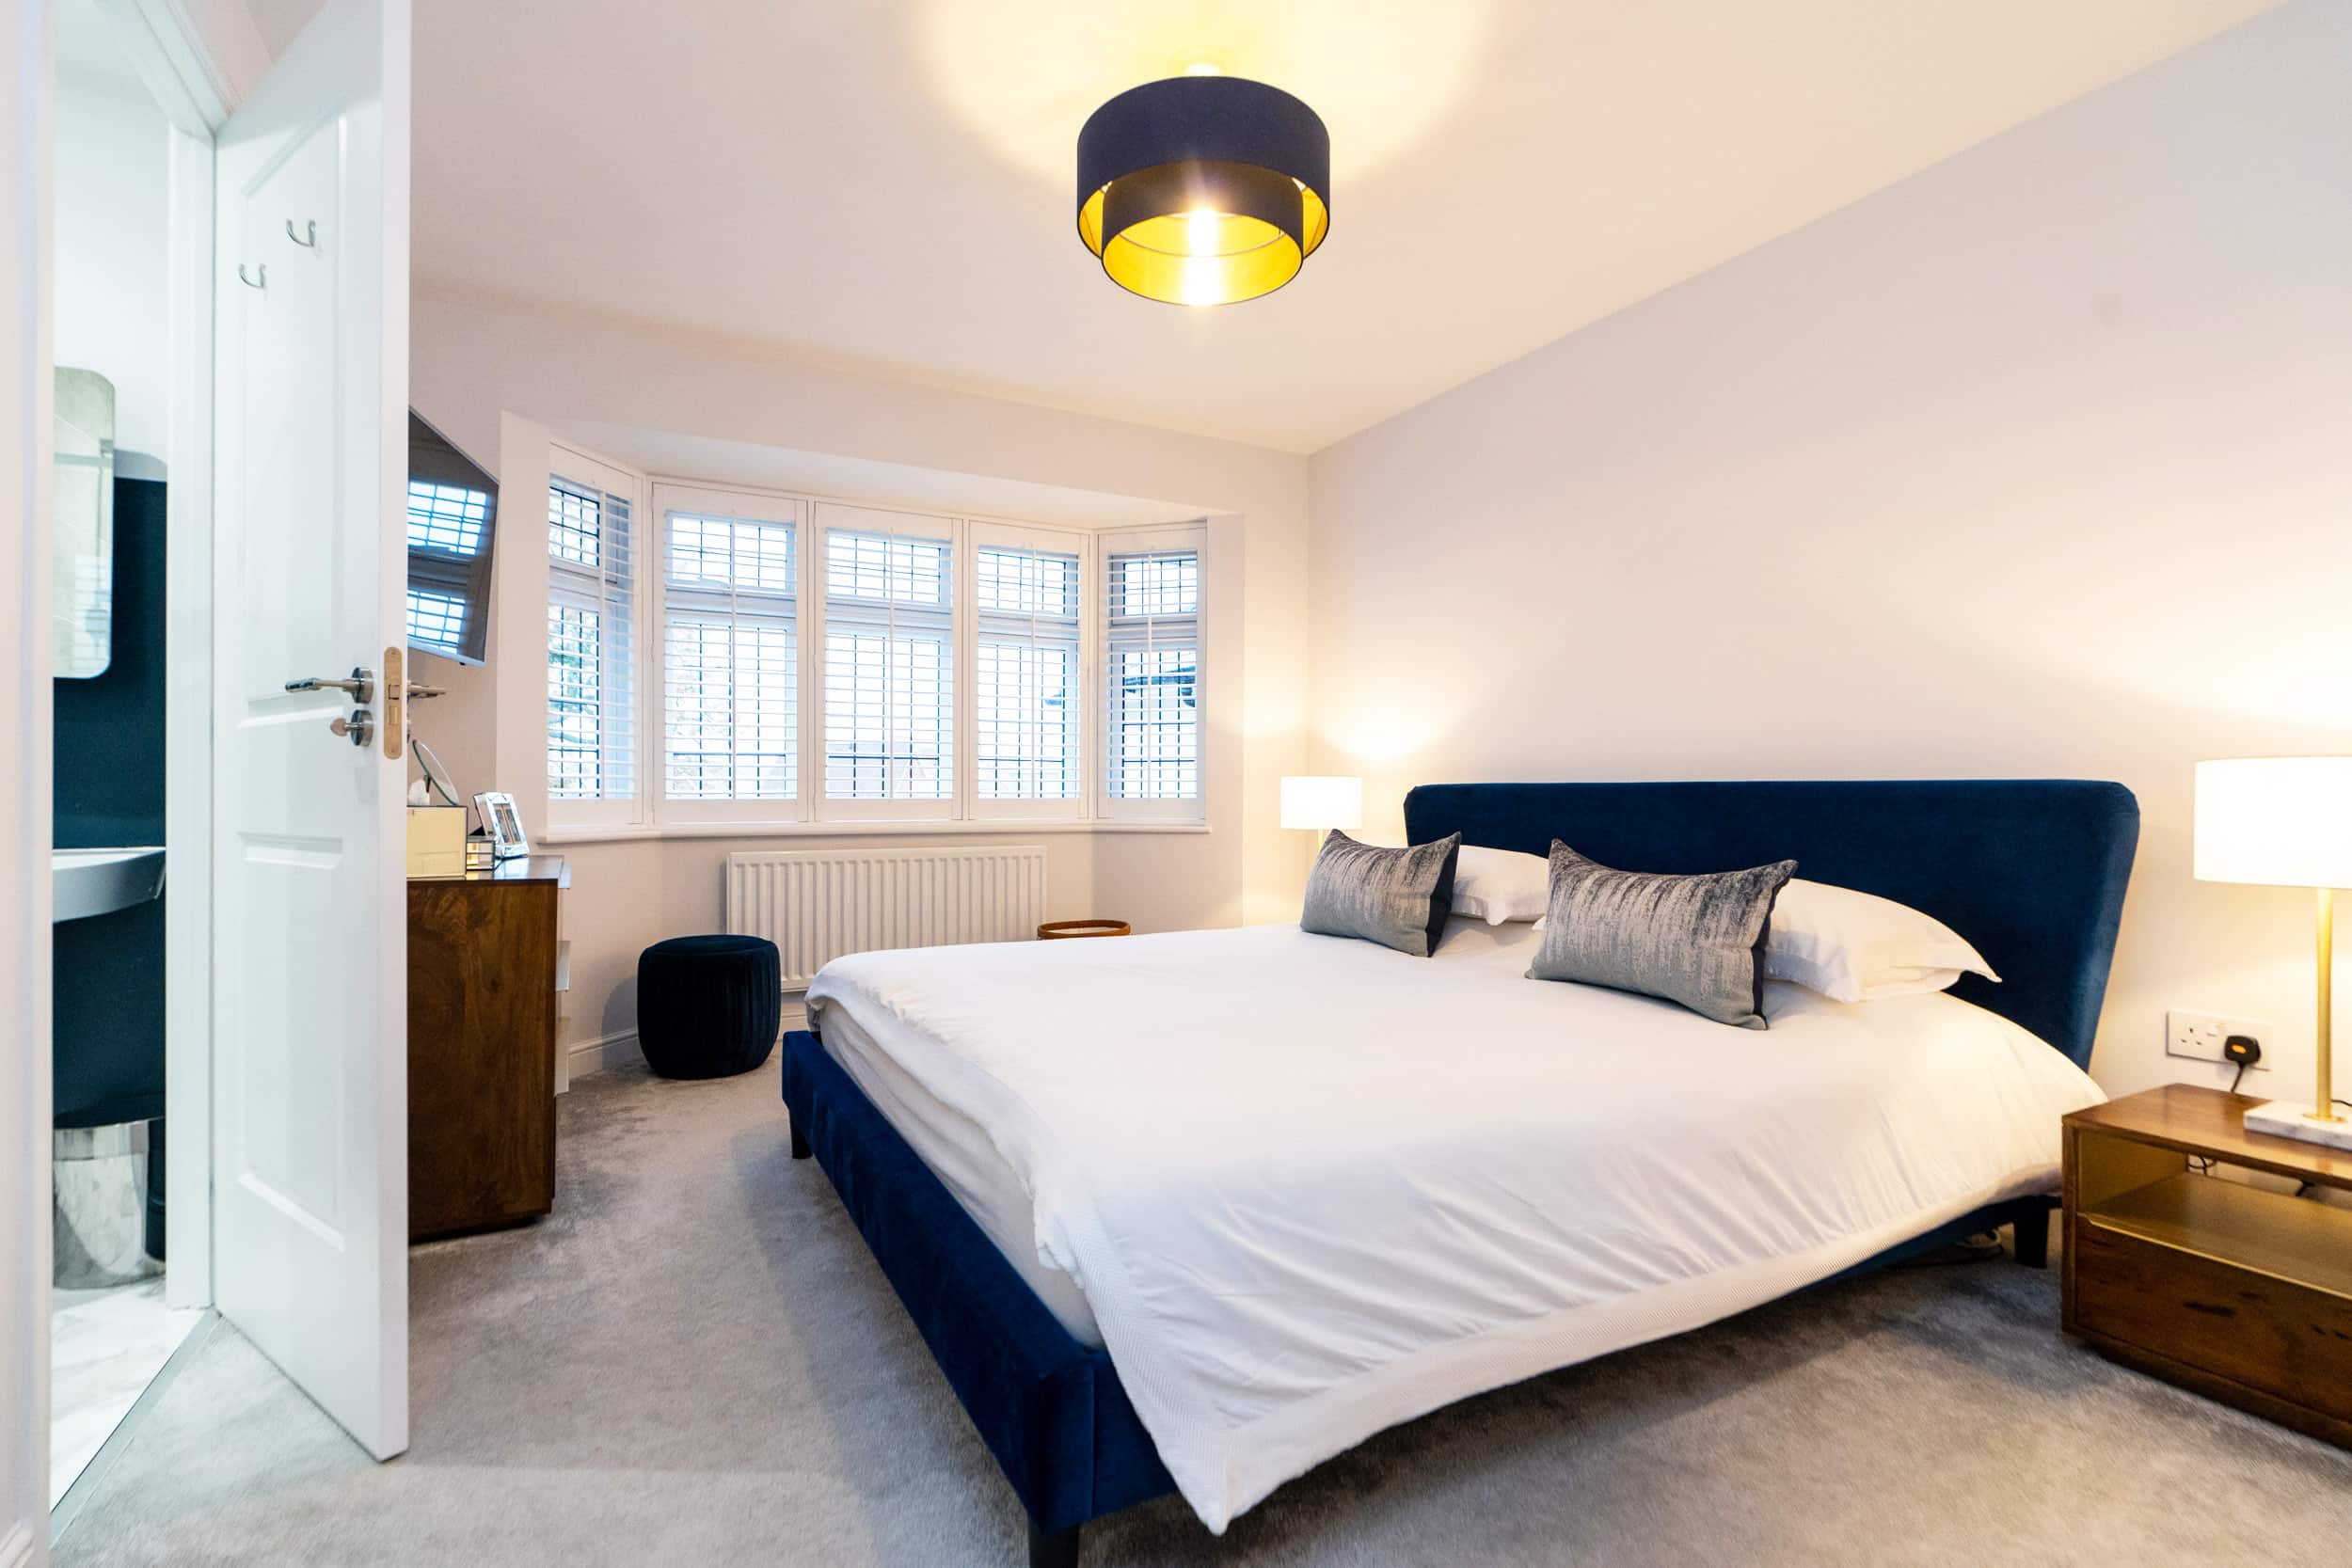
One of the most common mistakes when taking photos is using the camera at eye level. The problem is that when you do this, you end of with too much ceiling and a lot of the room appears to be missing. So what does the photographer then do? Well, an amateur will just point the camera downwards. This doesn’t sound terrible, but it actually makes for a really unnatural photo which our brains find confusing to look at. The verticals are no longer vertical, the image looks wonky and the lines appear to converge at the top.
So what should you do instead? It’s actually really simple to correct. Instead of pointing the camera downwards, move the camera lower and keep it level. Waist height usually works well, but don’t go too low otherwise it will make for an equally strange photo. If you find it difficult to get the camera straight shooting handheld, you can try using a tripod with a bubble level.
Take your eyes off your screen and look around you, you’ll notice that it doesn’t matter whether you look up or down, uprights always appear vertical to us. You should recreate this in photos so they look natural to our brains.
8. Show the Flow
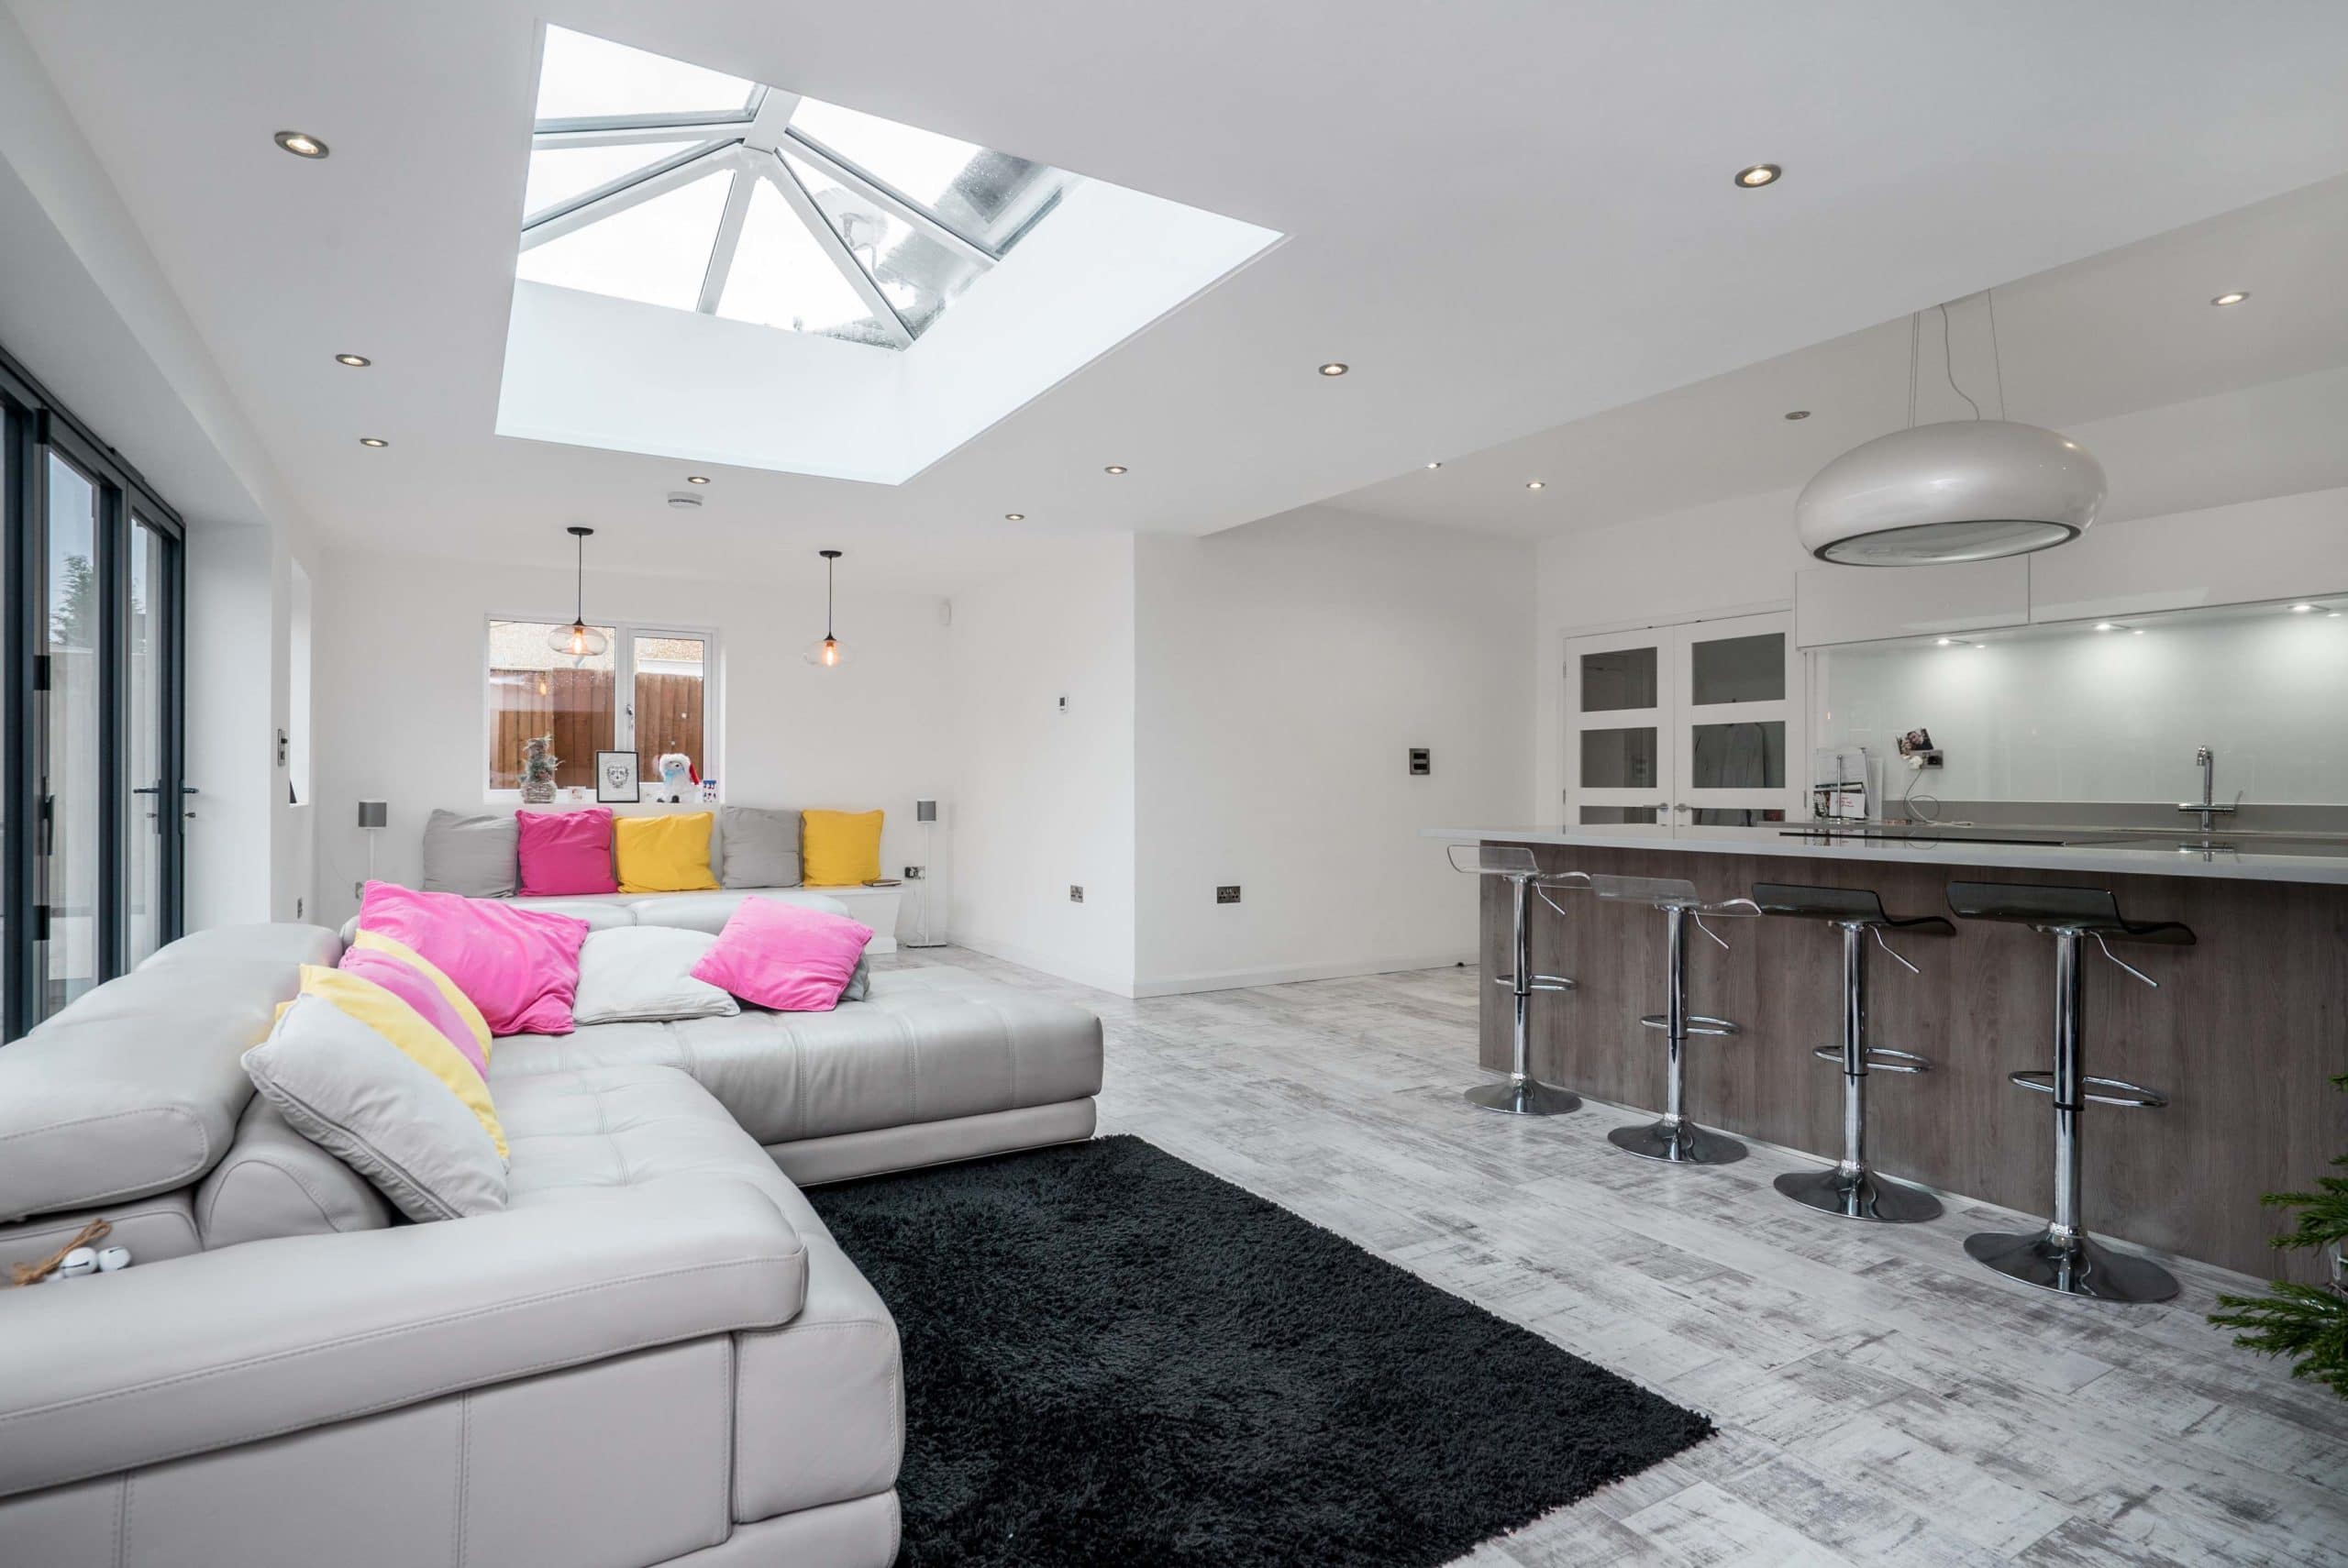
You don’t need to close all the doors! The layout of a house is one of the most important things to buyers.
If you have rooms which flow and complement each other, then think about how you can capture this. Photos looking through doors to the next room can work really well and help buyers to understand the floorplan of the property.
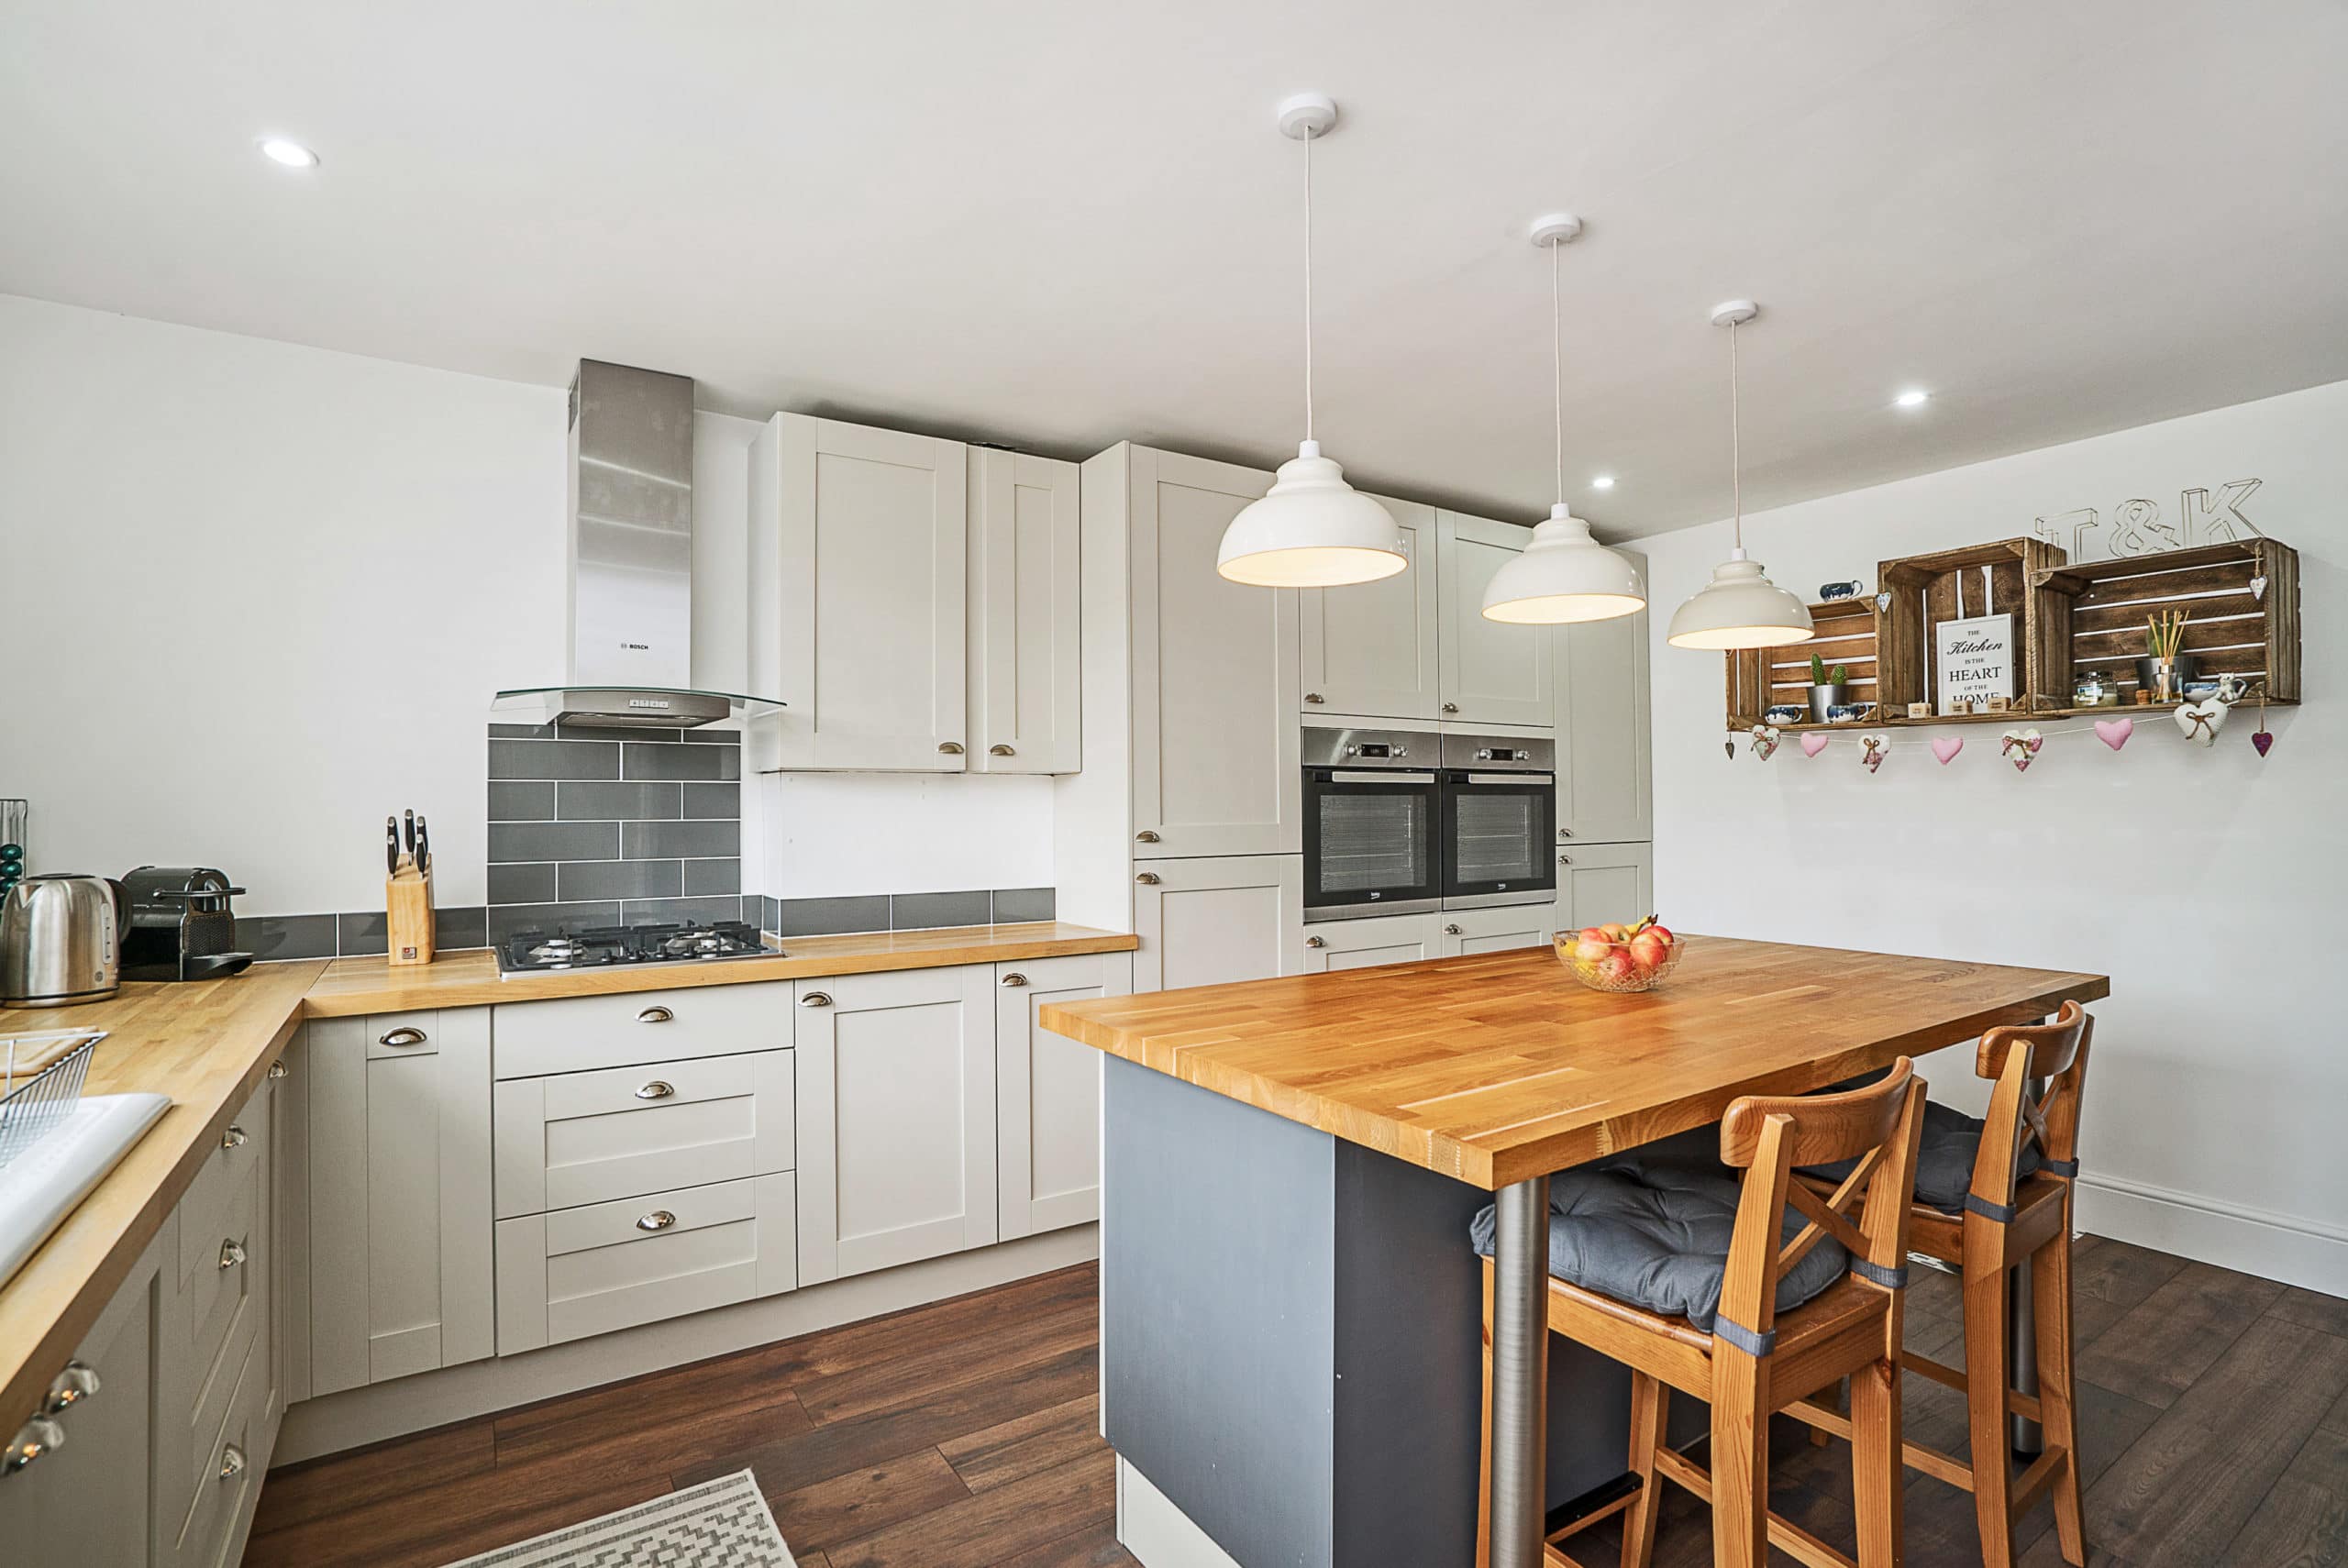
7. lights on or off?

Whether you should have the lights on or off depends on what type of lighting there is and how much natural light is available. The problem is that a lot of artificial lighting is very yellow and sometimes this can discolour the entire image, making a nice modern room look a bit gloomy and strange. Conversely, if you’ve got some crisp white downlighters, they generally look great!
Lets take a look at the photo above. Without the lights on, the kitchen and dining rooms at the back would appear very dark compared to the bright lounge in the foreground. The dining room light is quite yellow which discolours the room slightly, but it’s a necessary trade off in this example. We’ve chosen to put the ceiling lights on in the lounge too, simply because they’re a nice feature and there’s so much natural light they’re not comparatively bright enough to cause any yellow discolouration. However, if the lounge lights were causing a yellow tint, we would have left them turned off.
6. get your timing right
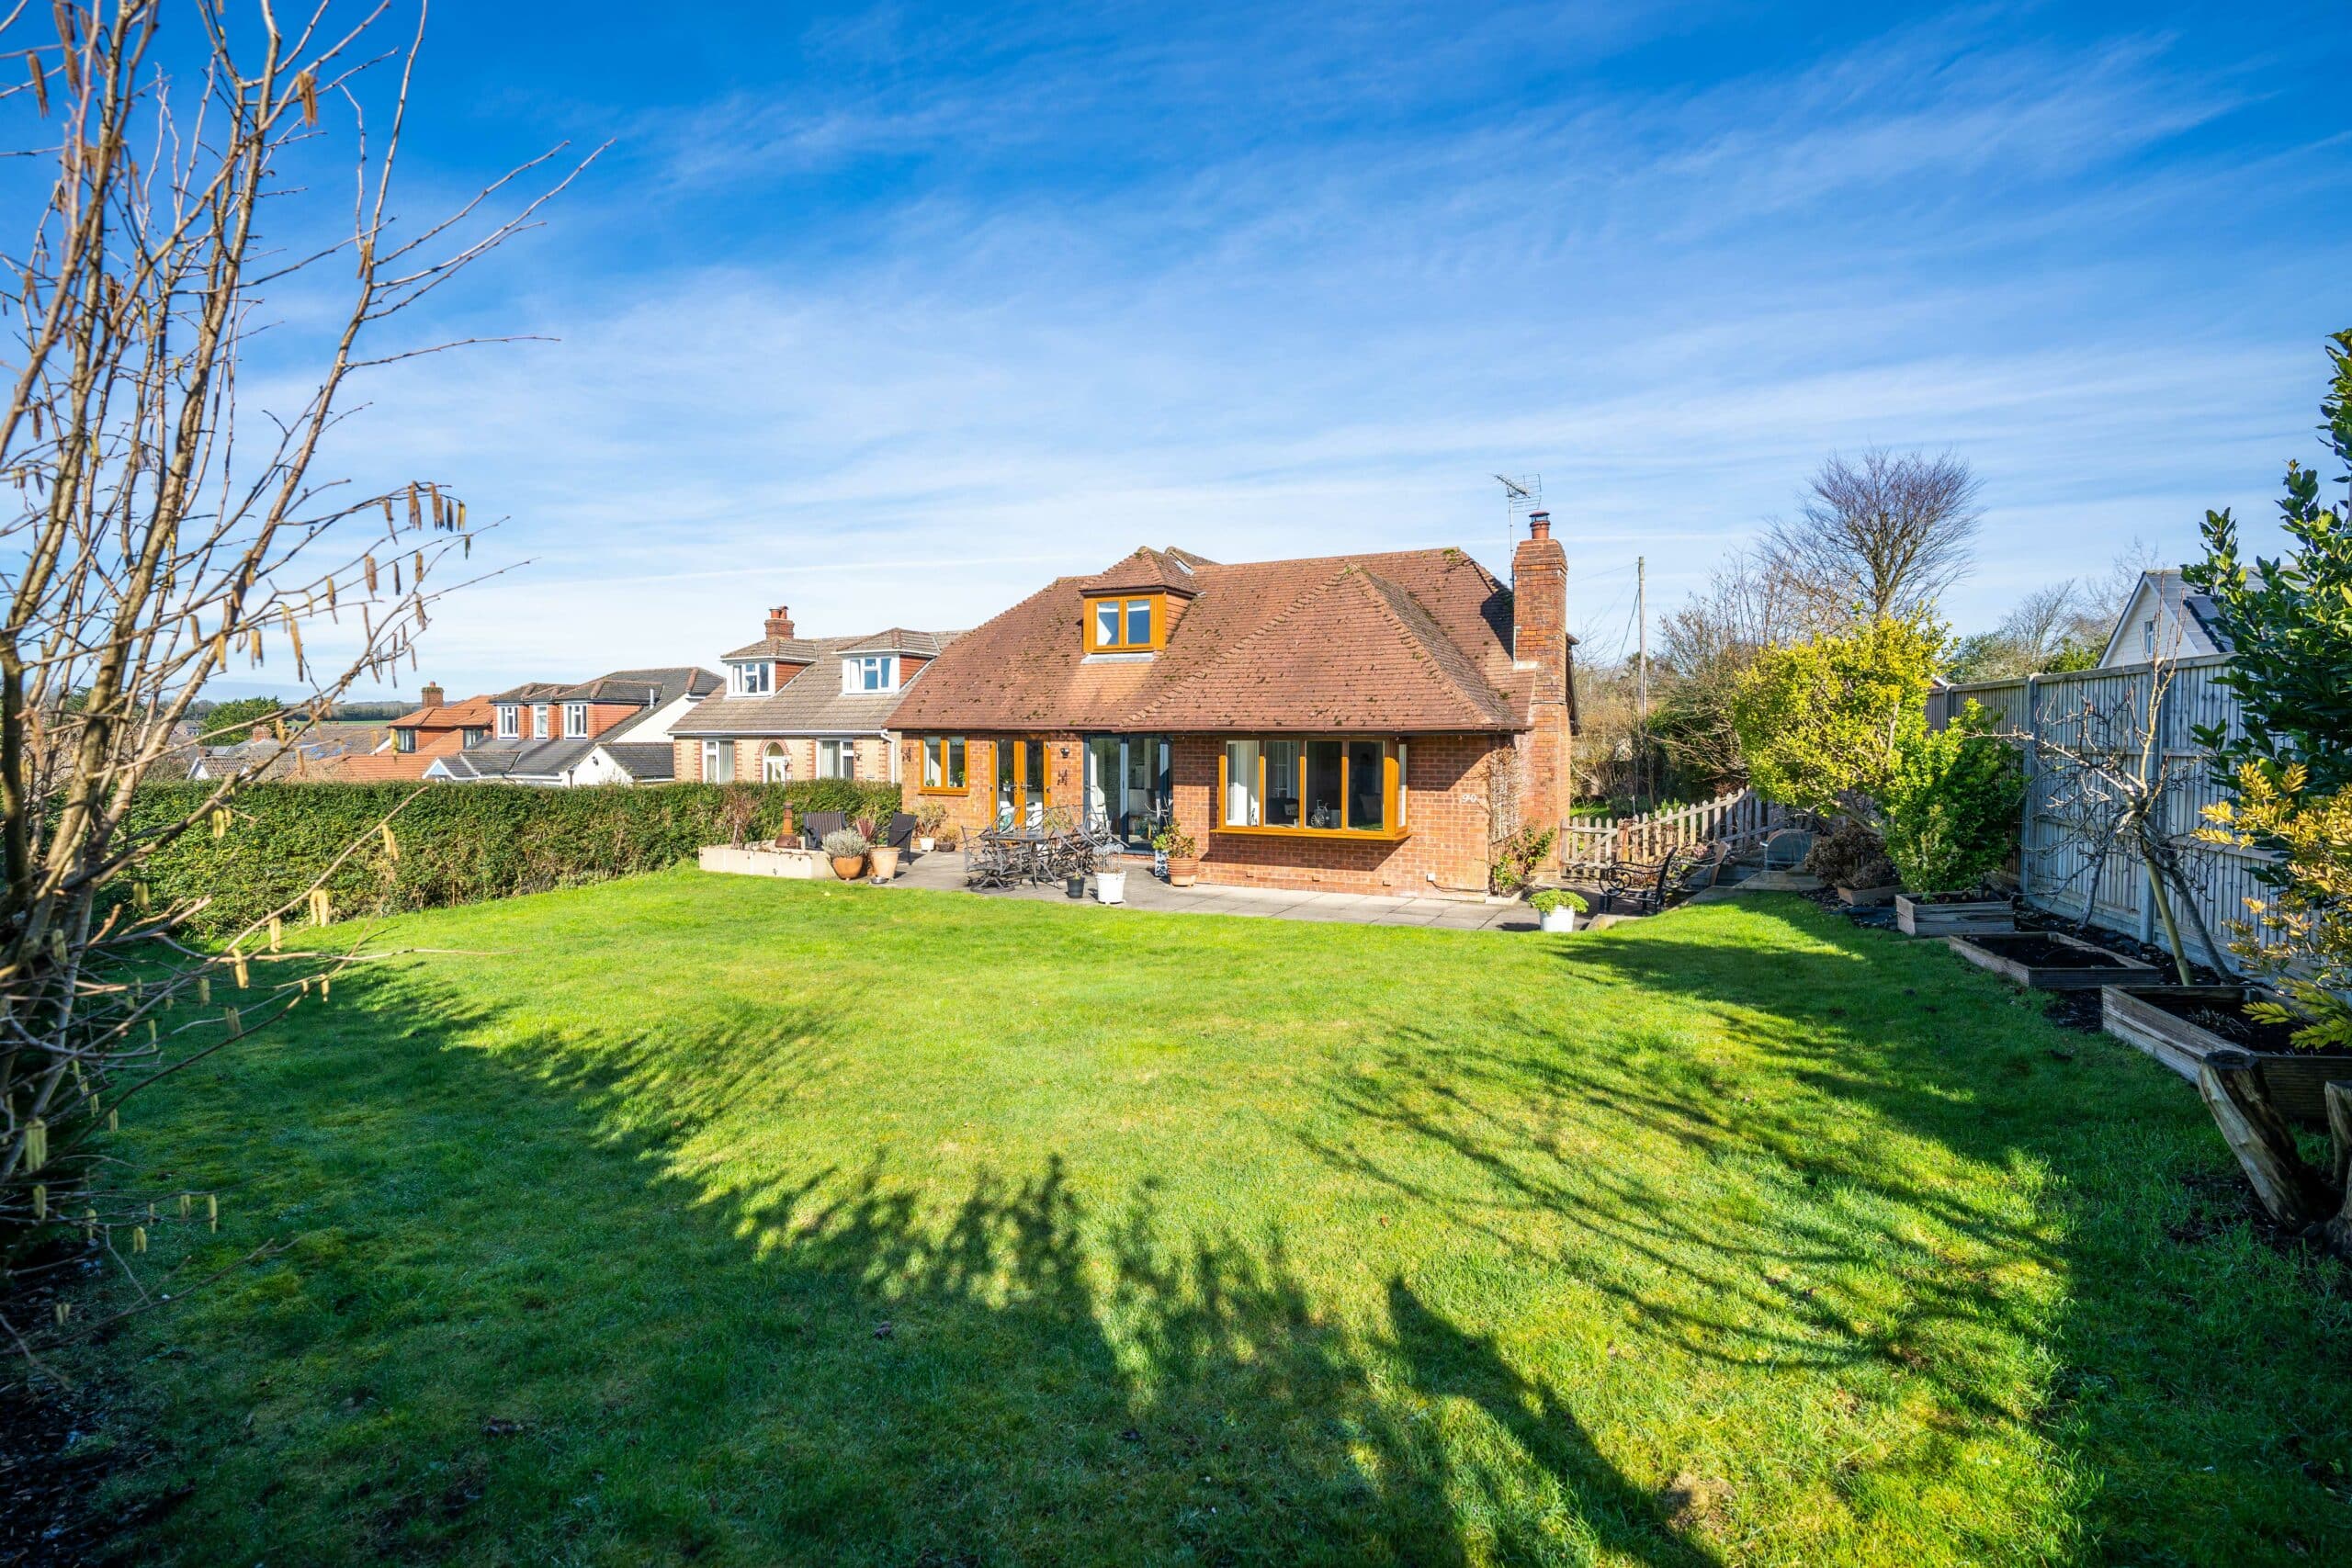
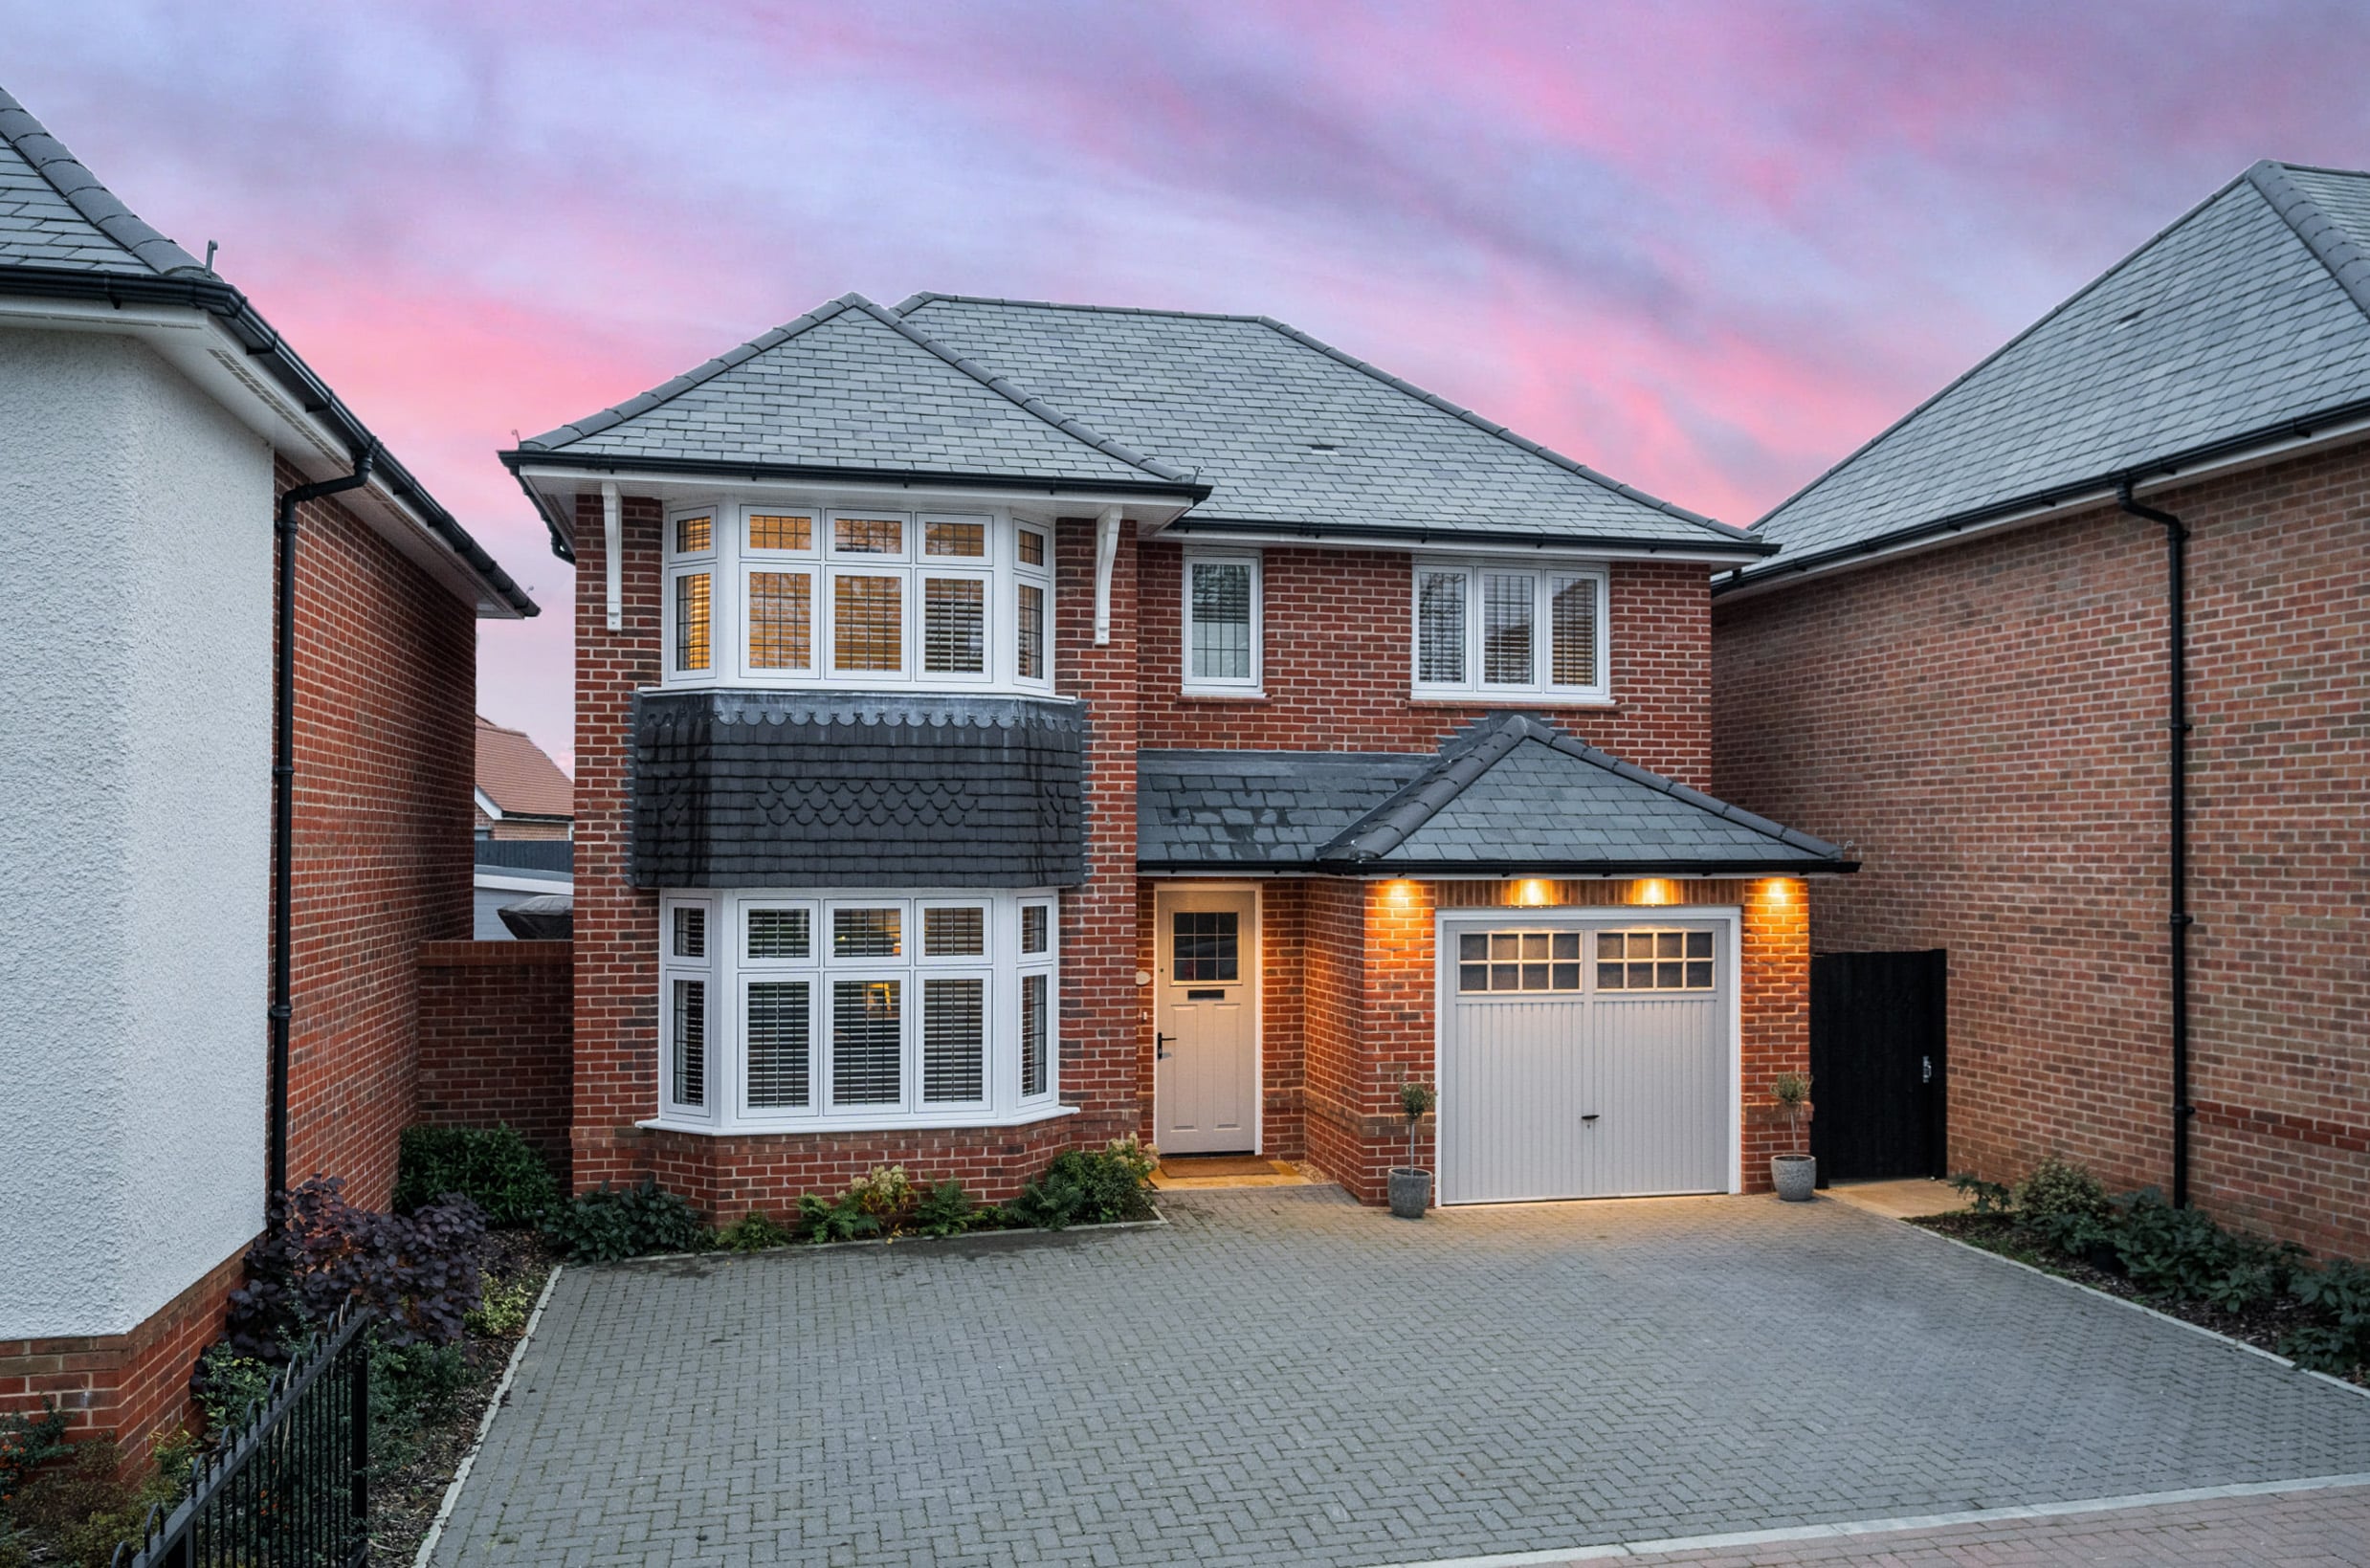
When it comes to the outside photos, you should consider the weather and also the best time of day to take the photos. For the main photo, you’ll want the sun on the front and likewise for the rear elevation of the house.
If your property is east-west, this just means doing the front and rear photos separately. In summer, you can probably manage to get both at the same time if it’s the middle of the day. If your house is north-south, either the front or rear will be easy but whichever is the north facing aspect will require more thought. This can be even more tricky in winter when the photo could be heavily backlit. If you are really struggling with the north facing aspect, a good backup plan is to take the photograph on an overcast day. Then you can brighten it with Photoshop, and even add in a blue sky to get it looking good!
Our number one outside photo hack is to visit SunCalc, a free website which shows you where the sun will be at different times of day throughout the year.
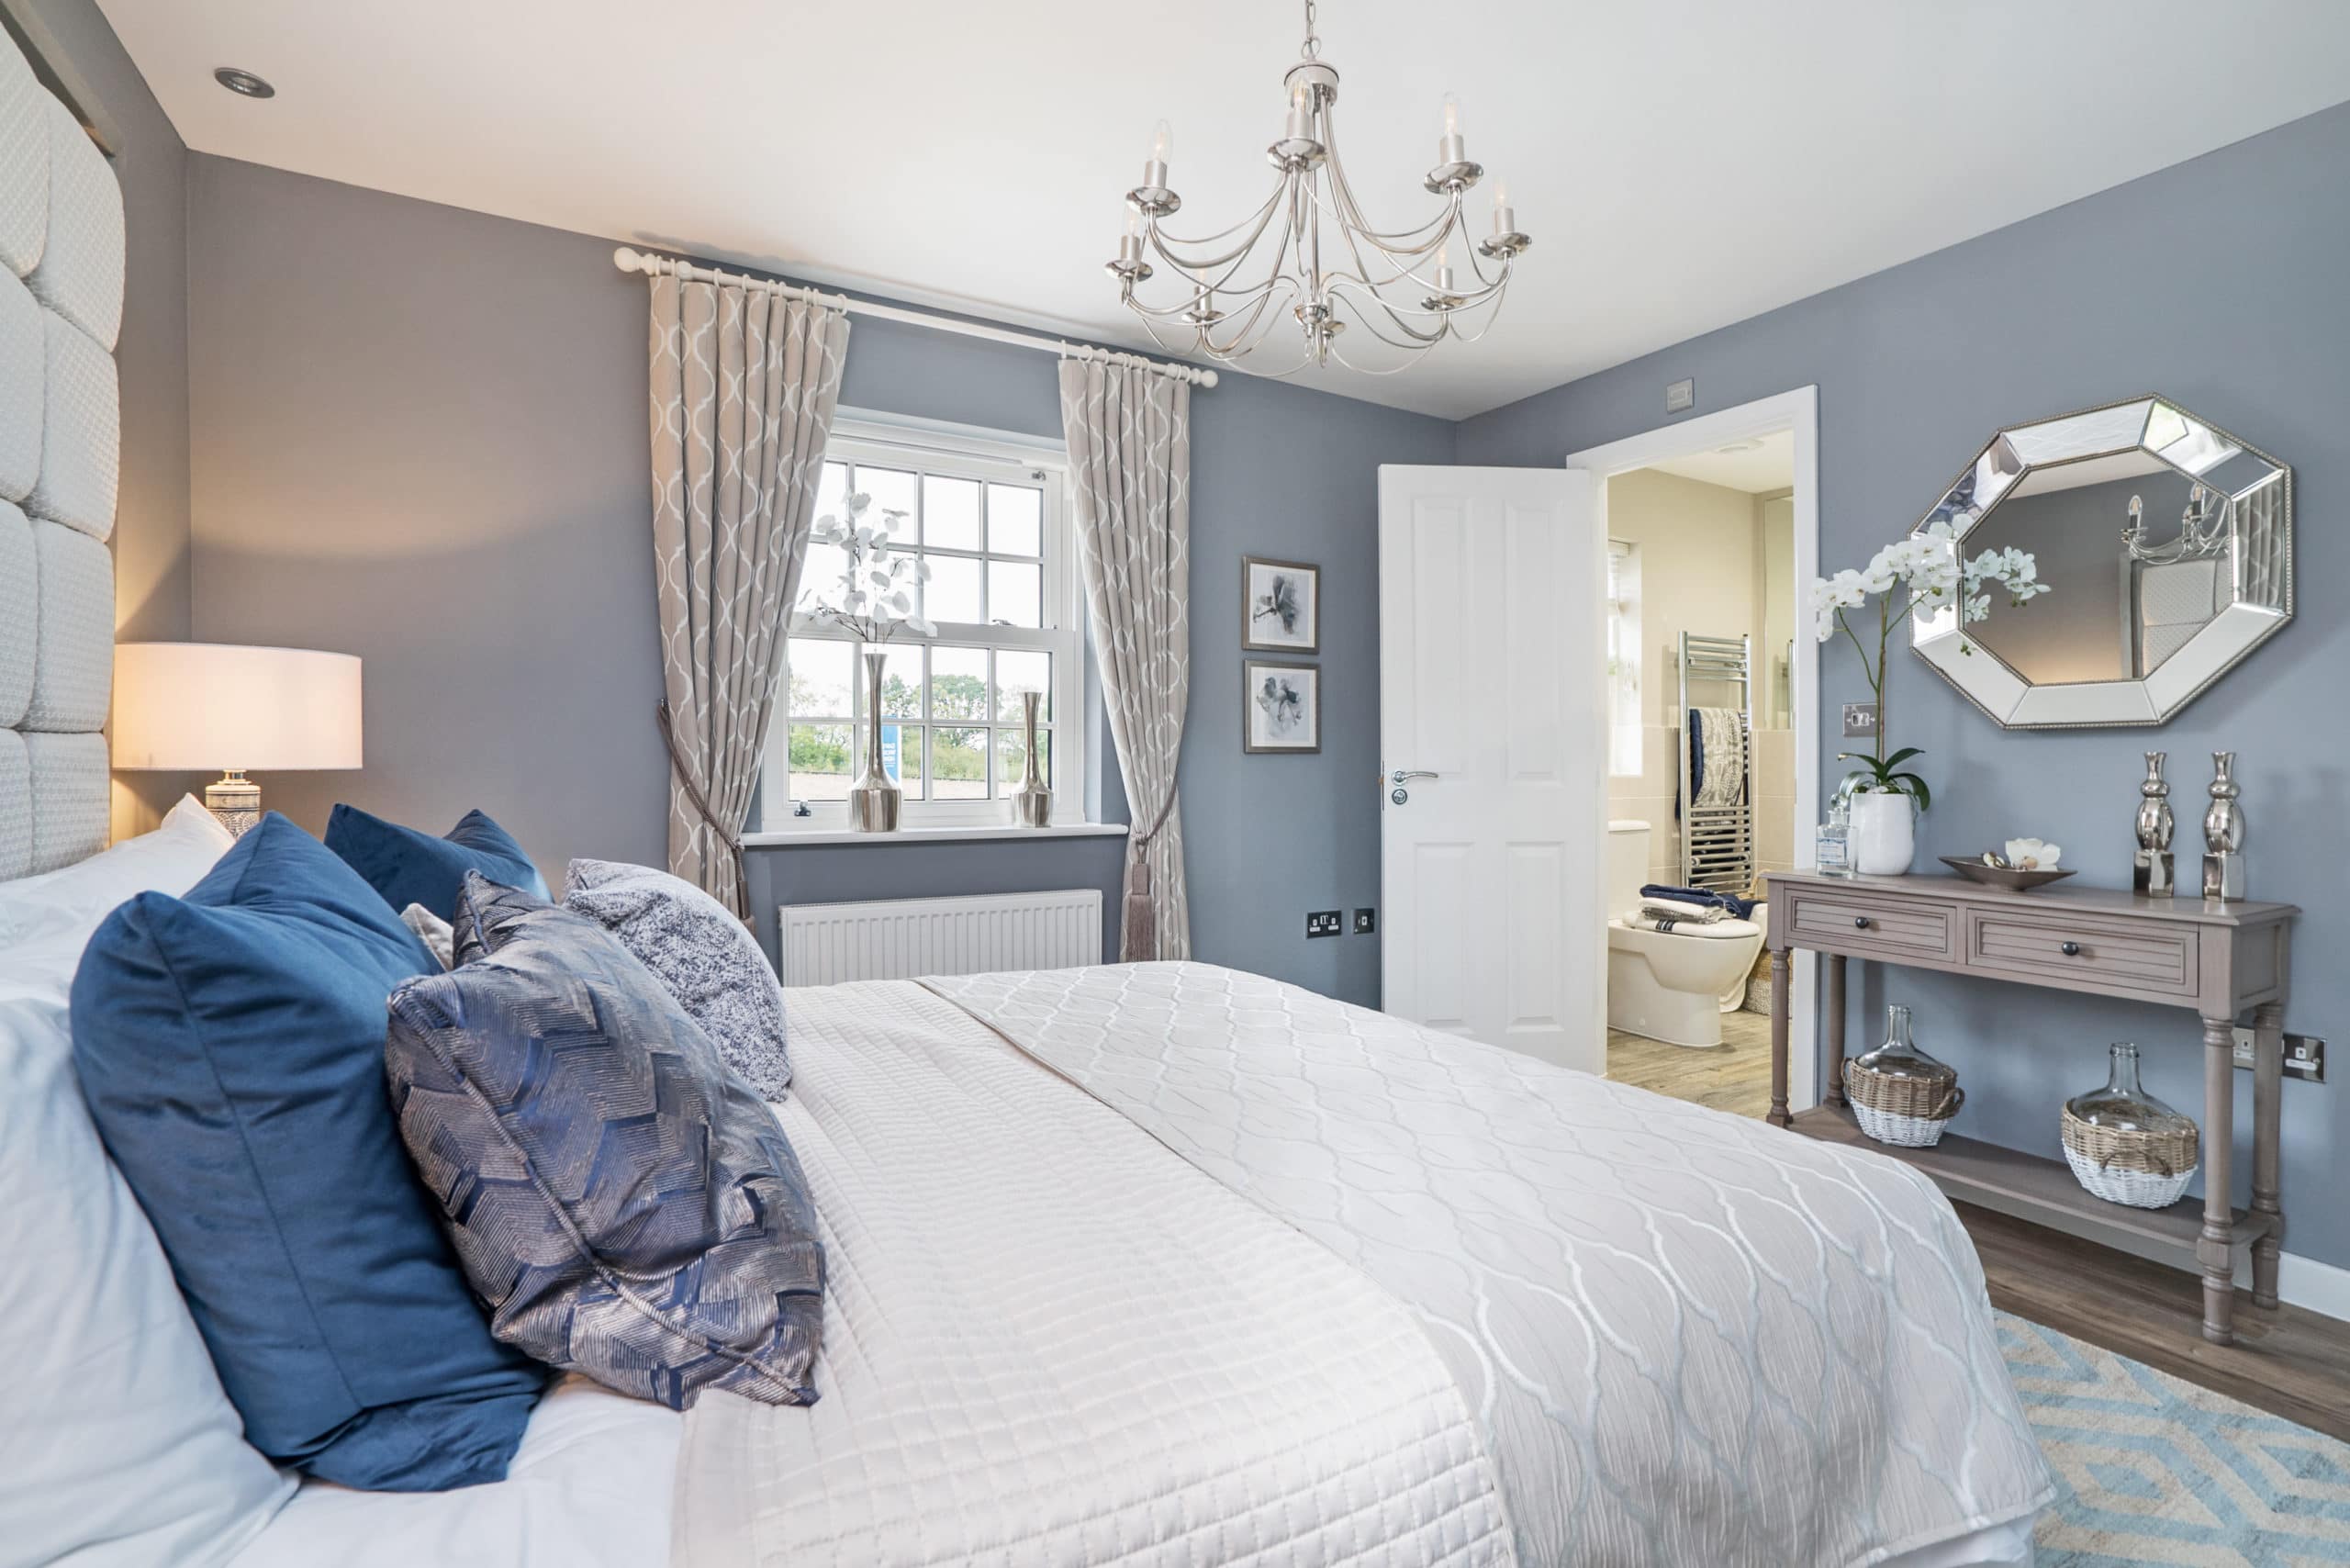
5. Look behind your toilet and sink
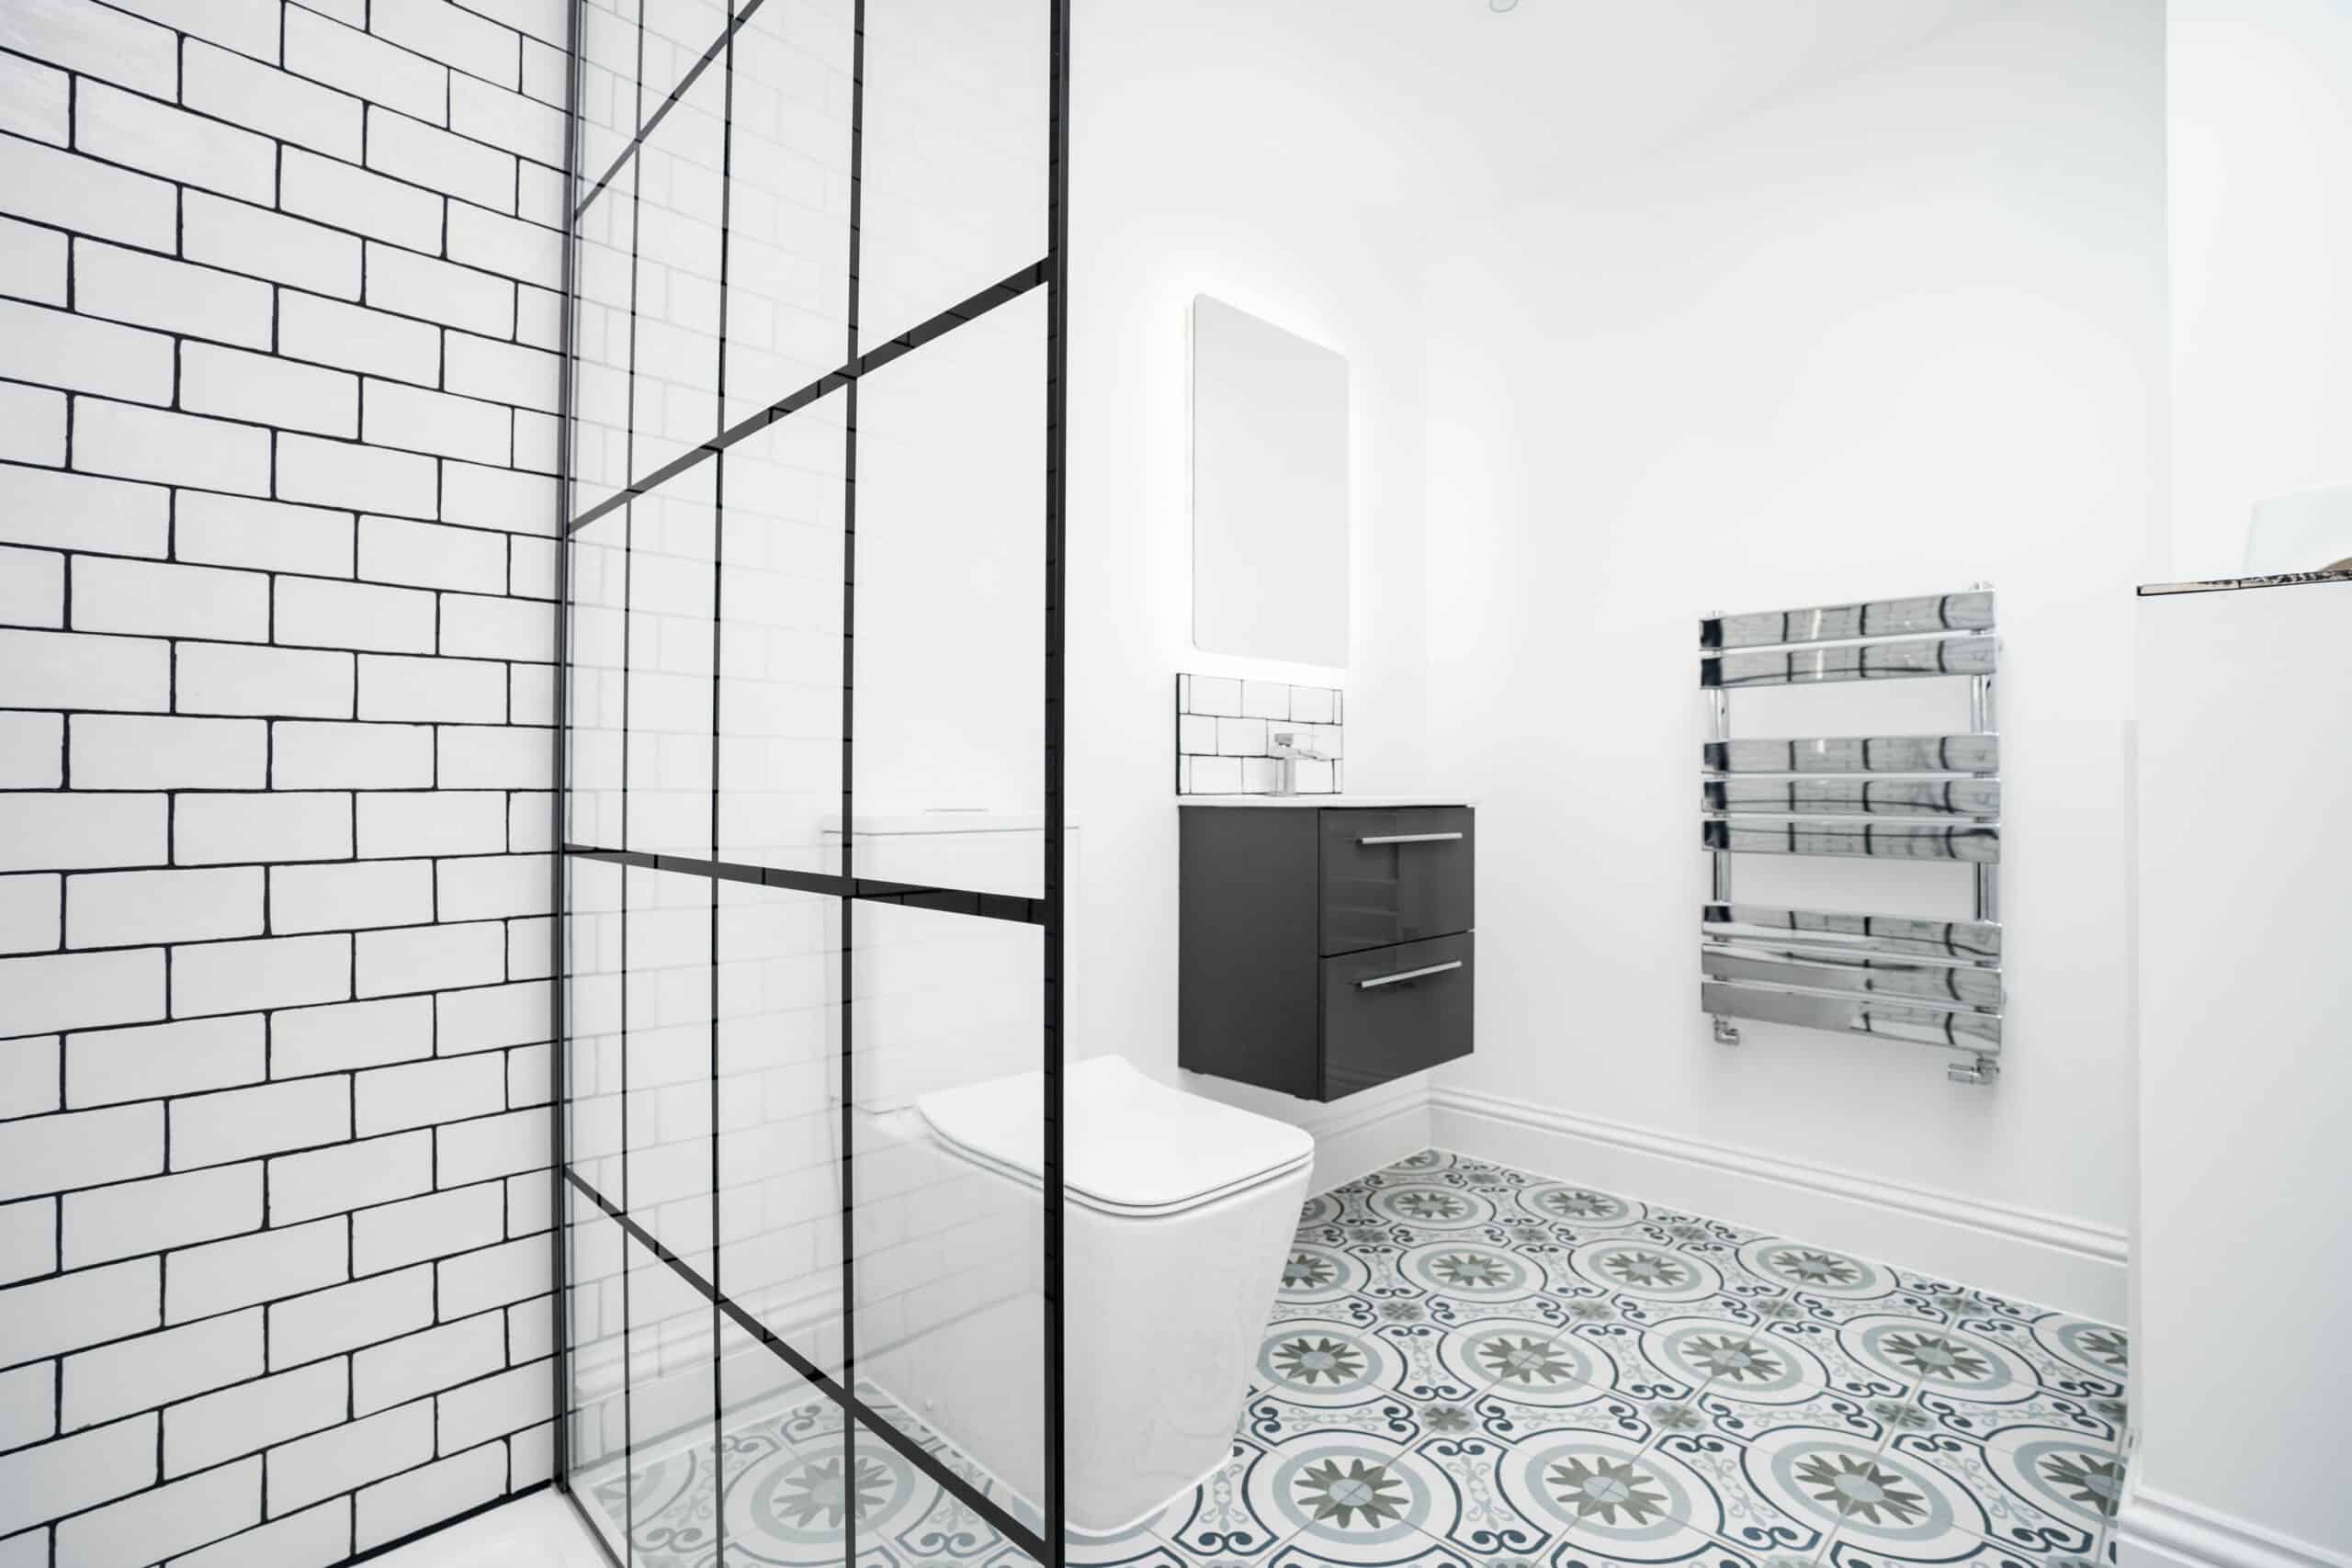
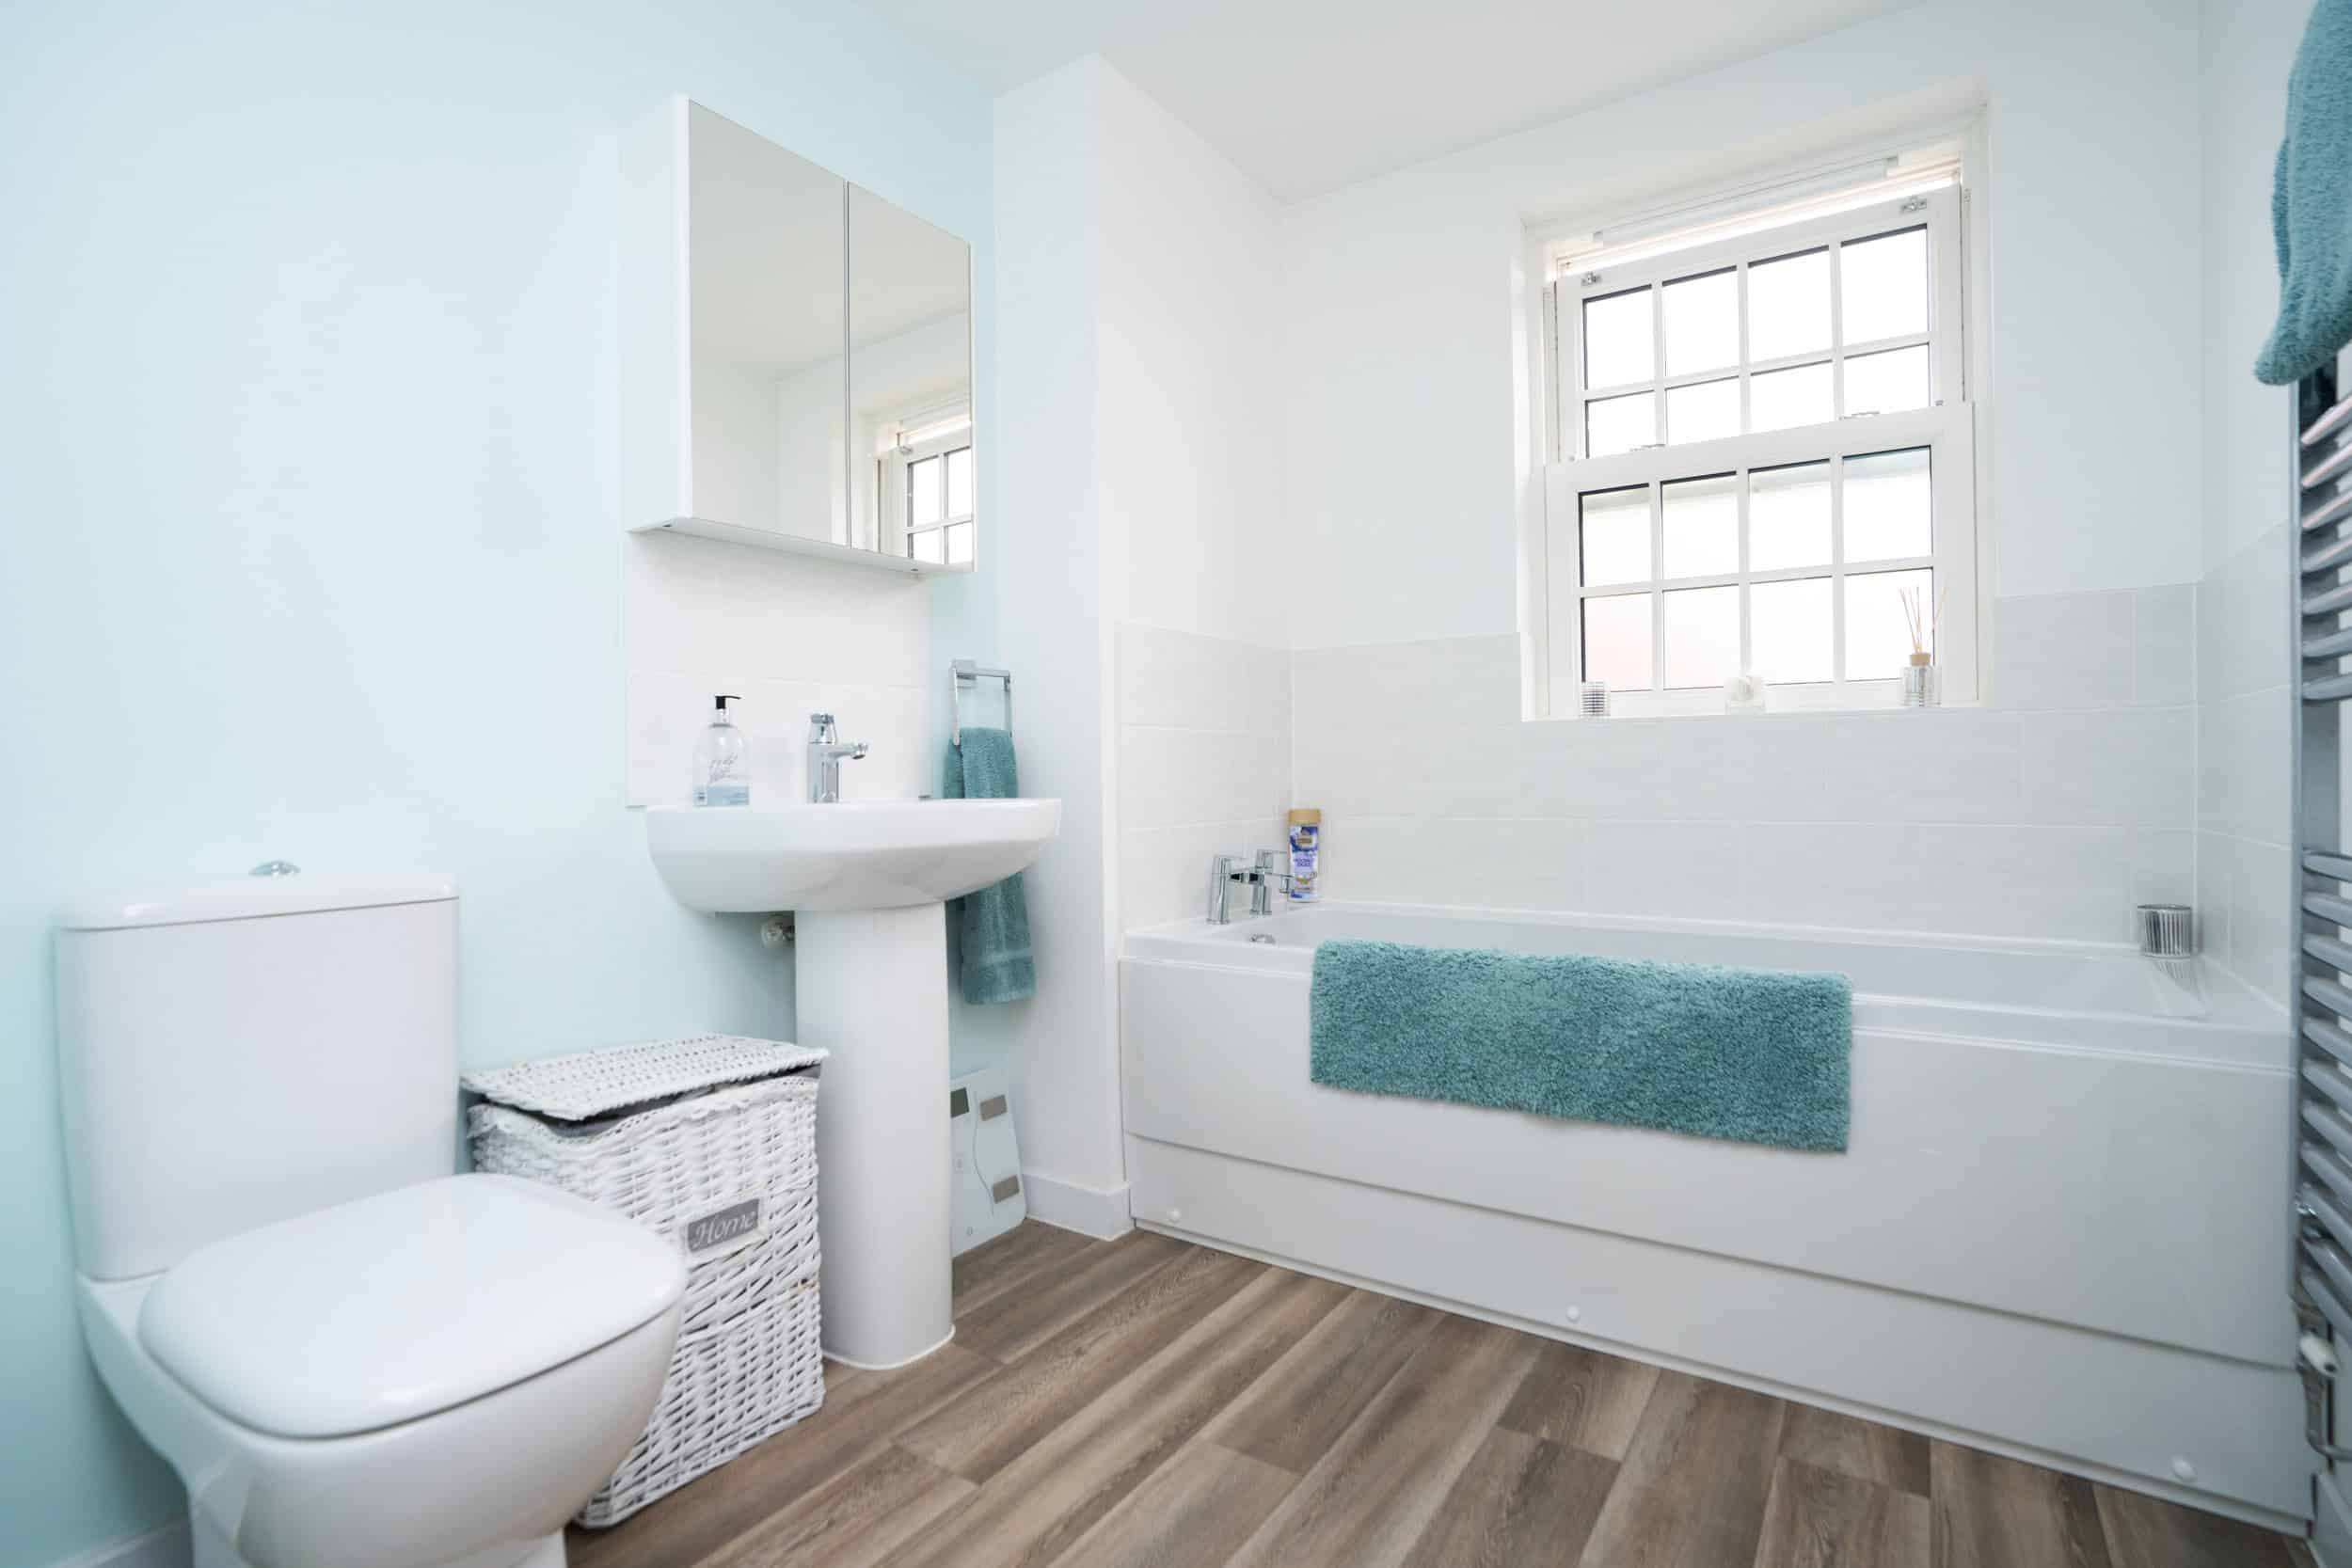
Get rid of those bottles! Nothing spoils a bathroom photo more than toilet brushes, bleach and other cleaning fluids left all around the toilet and sink. It’s not very hygienic or pleasant for agents and photographers to move these, which means they often don’t.
In addition, you shouldn’t leave numerous bottles of shampoos and soaps on the bath or in the shower. Remember to clean your glass shower screen and chrome taps too!
You don’t need to remove everything, though. If you have a nice matching set of towels, a couple of shampoo bottles and some hand soap, that’s absolutely fine! In fact a few nicely placed items can actually improve the photo.
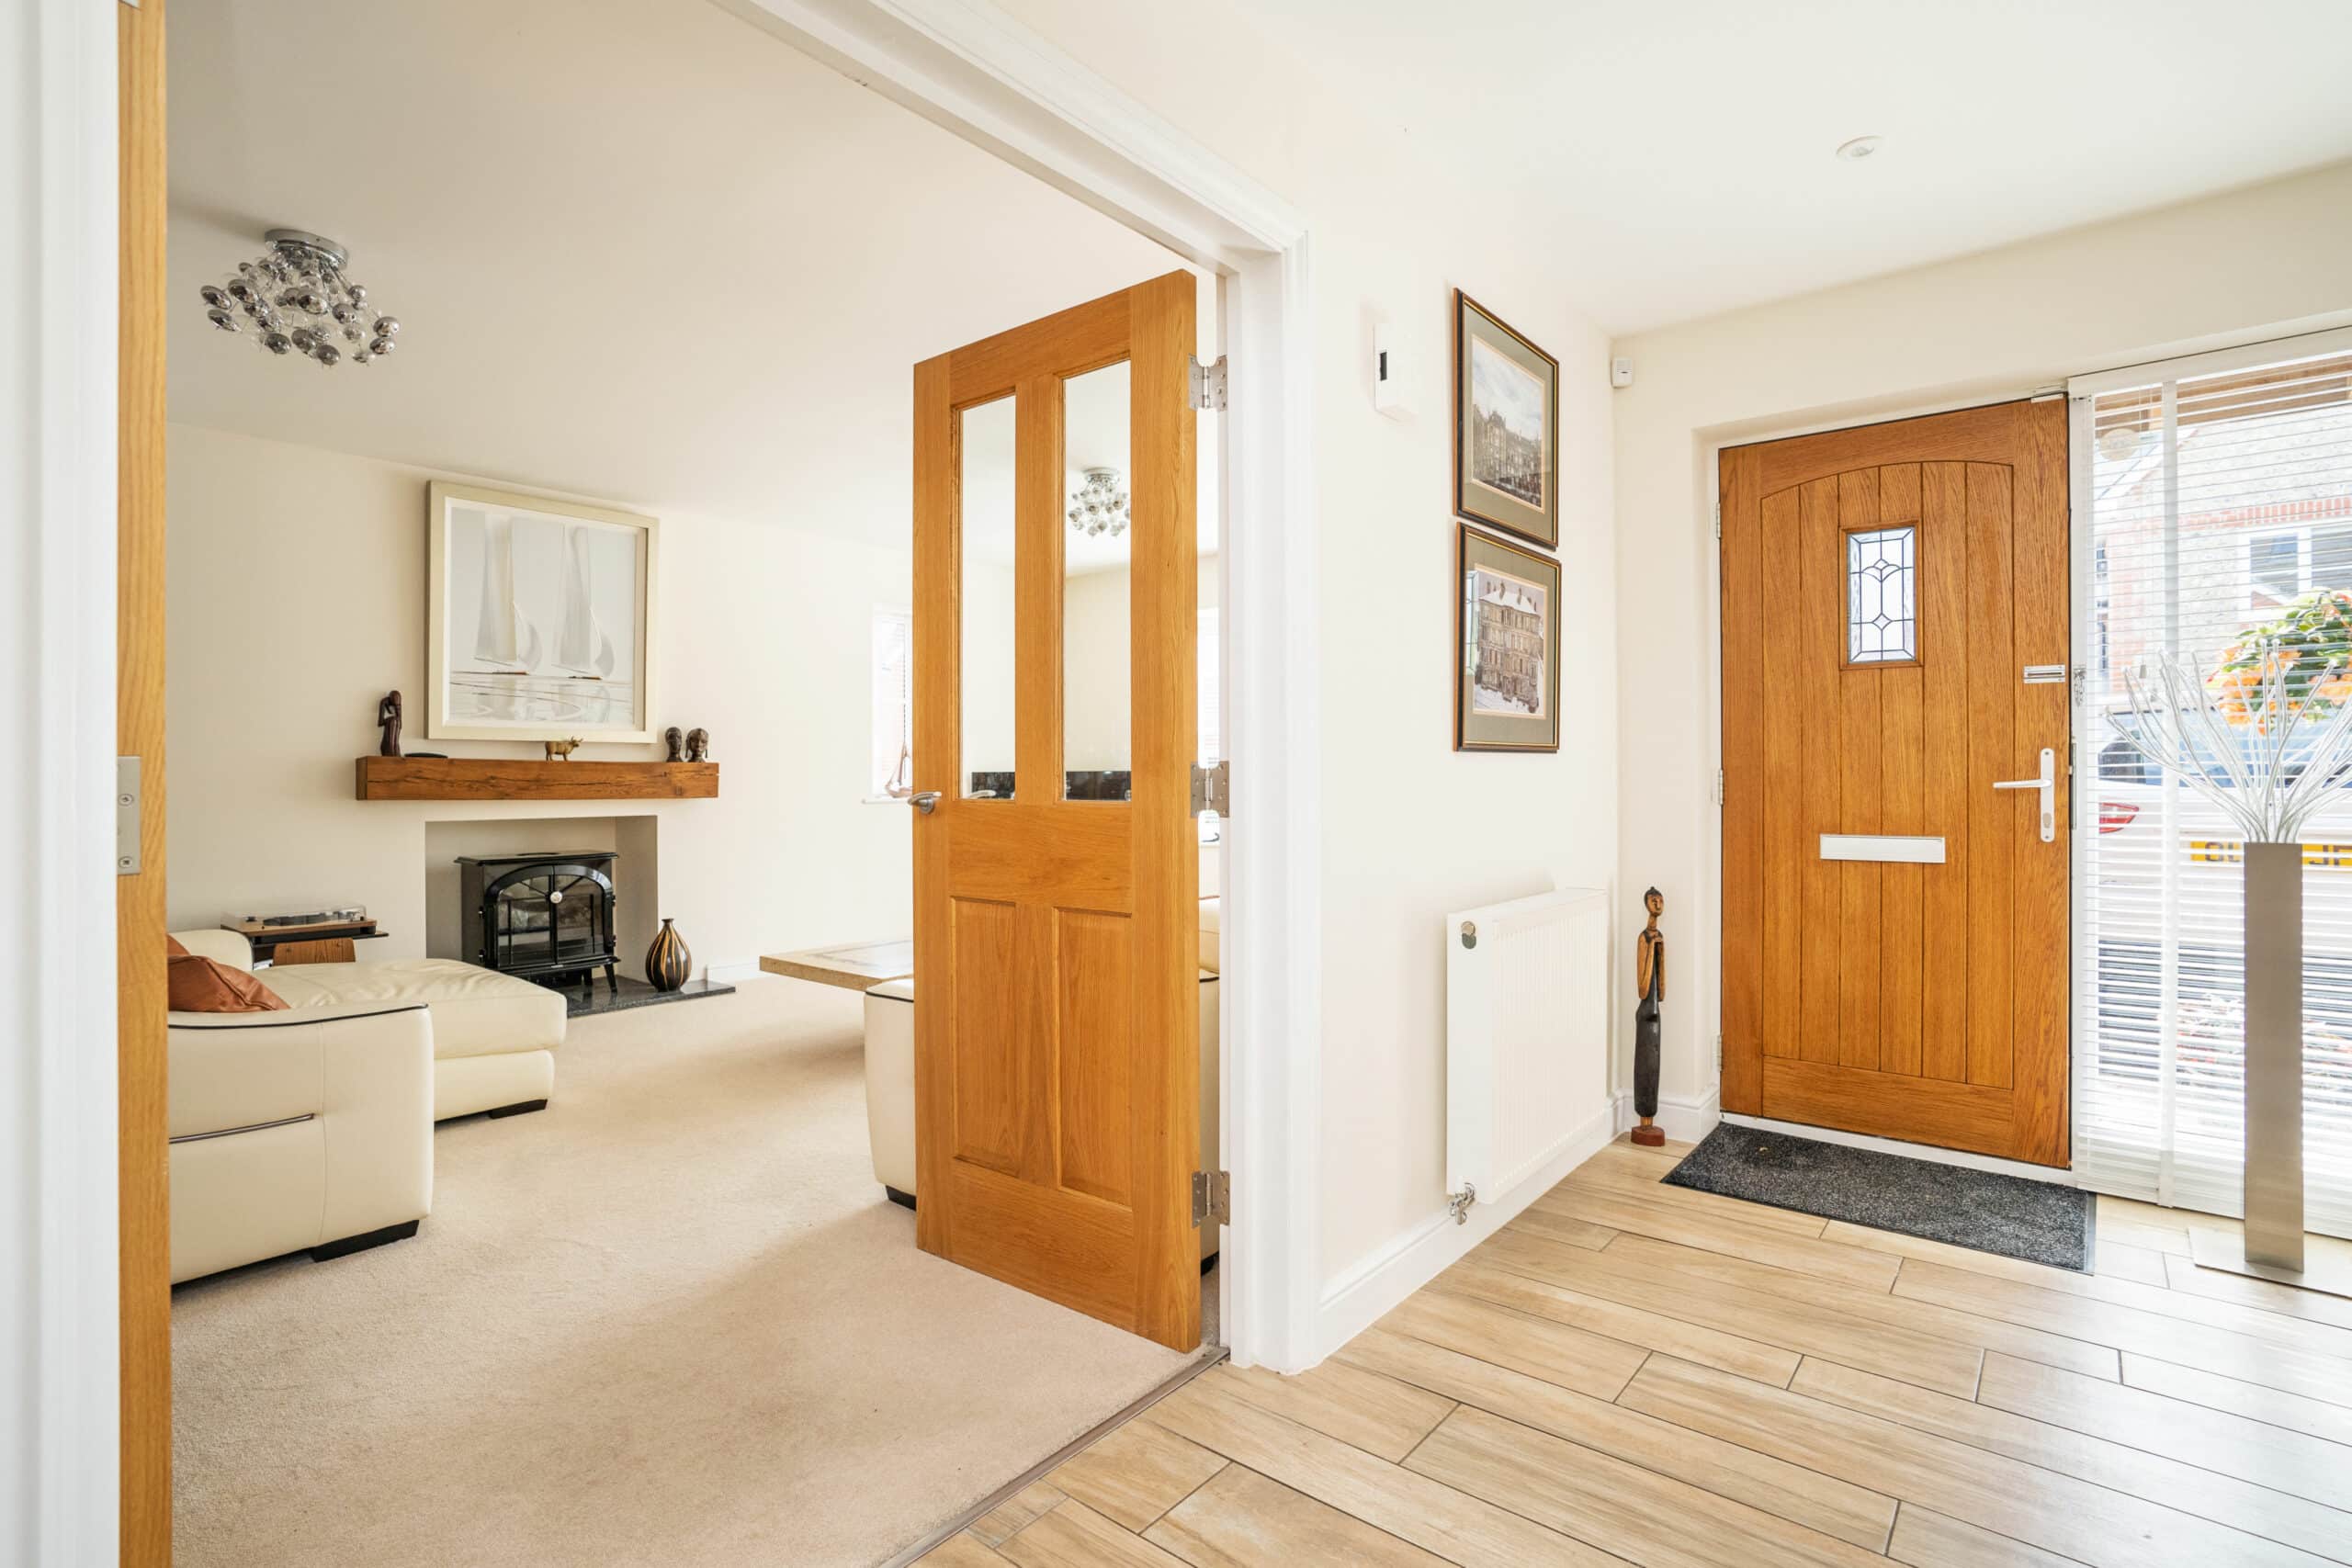
4. Don't forget the hallway
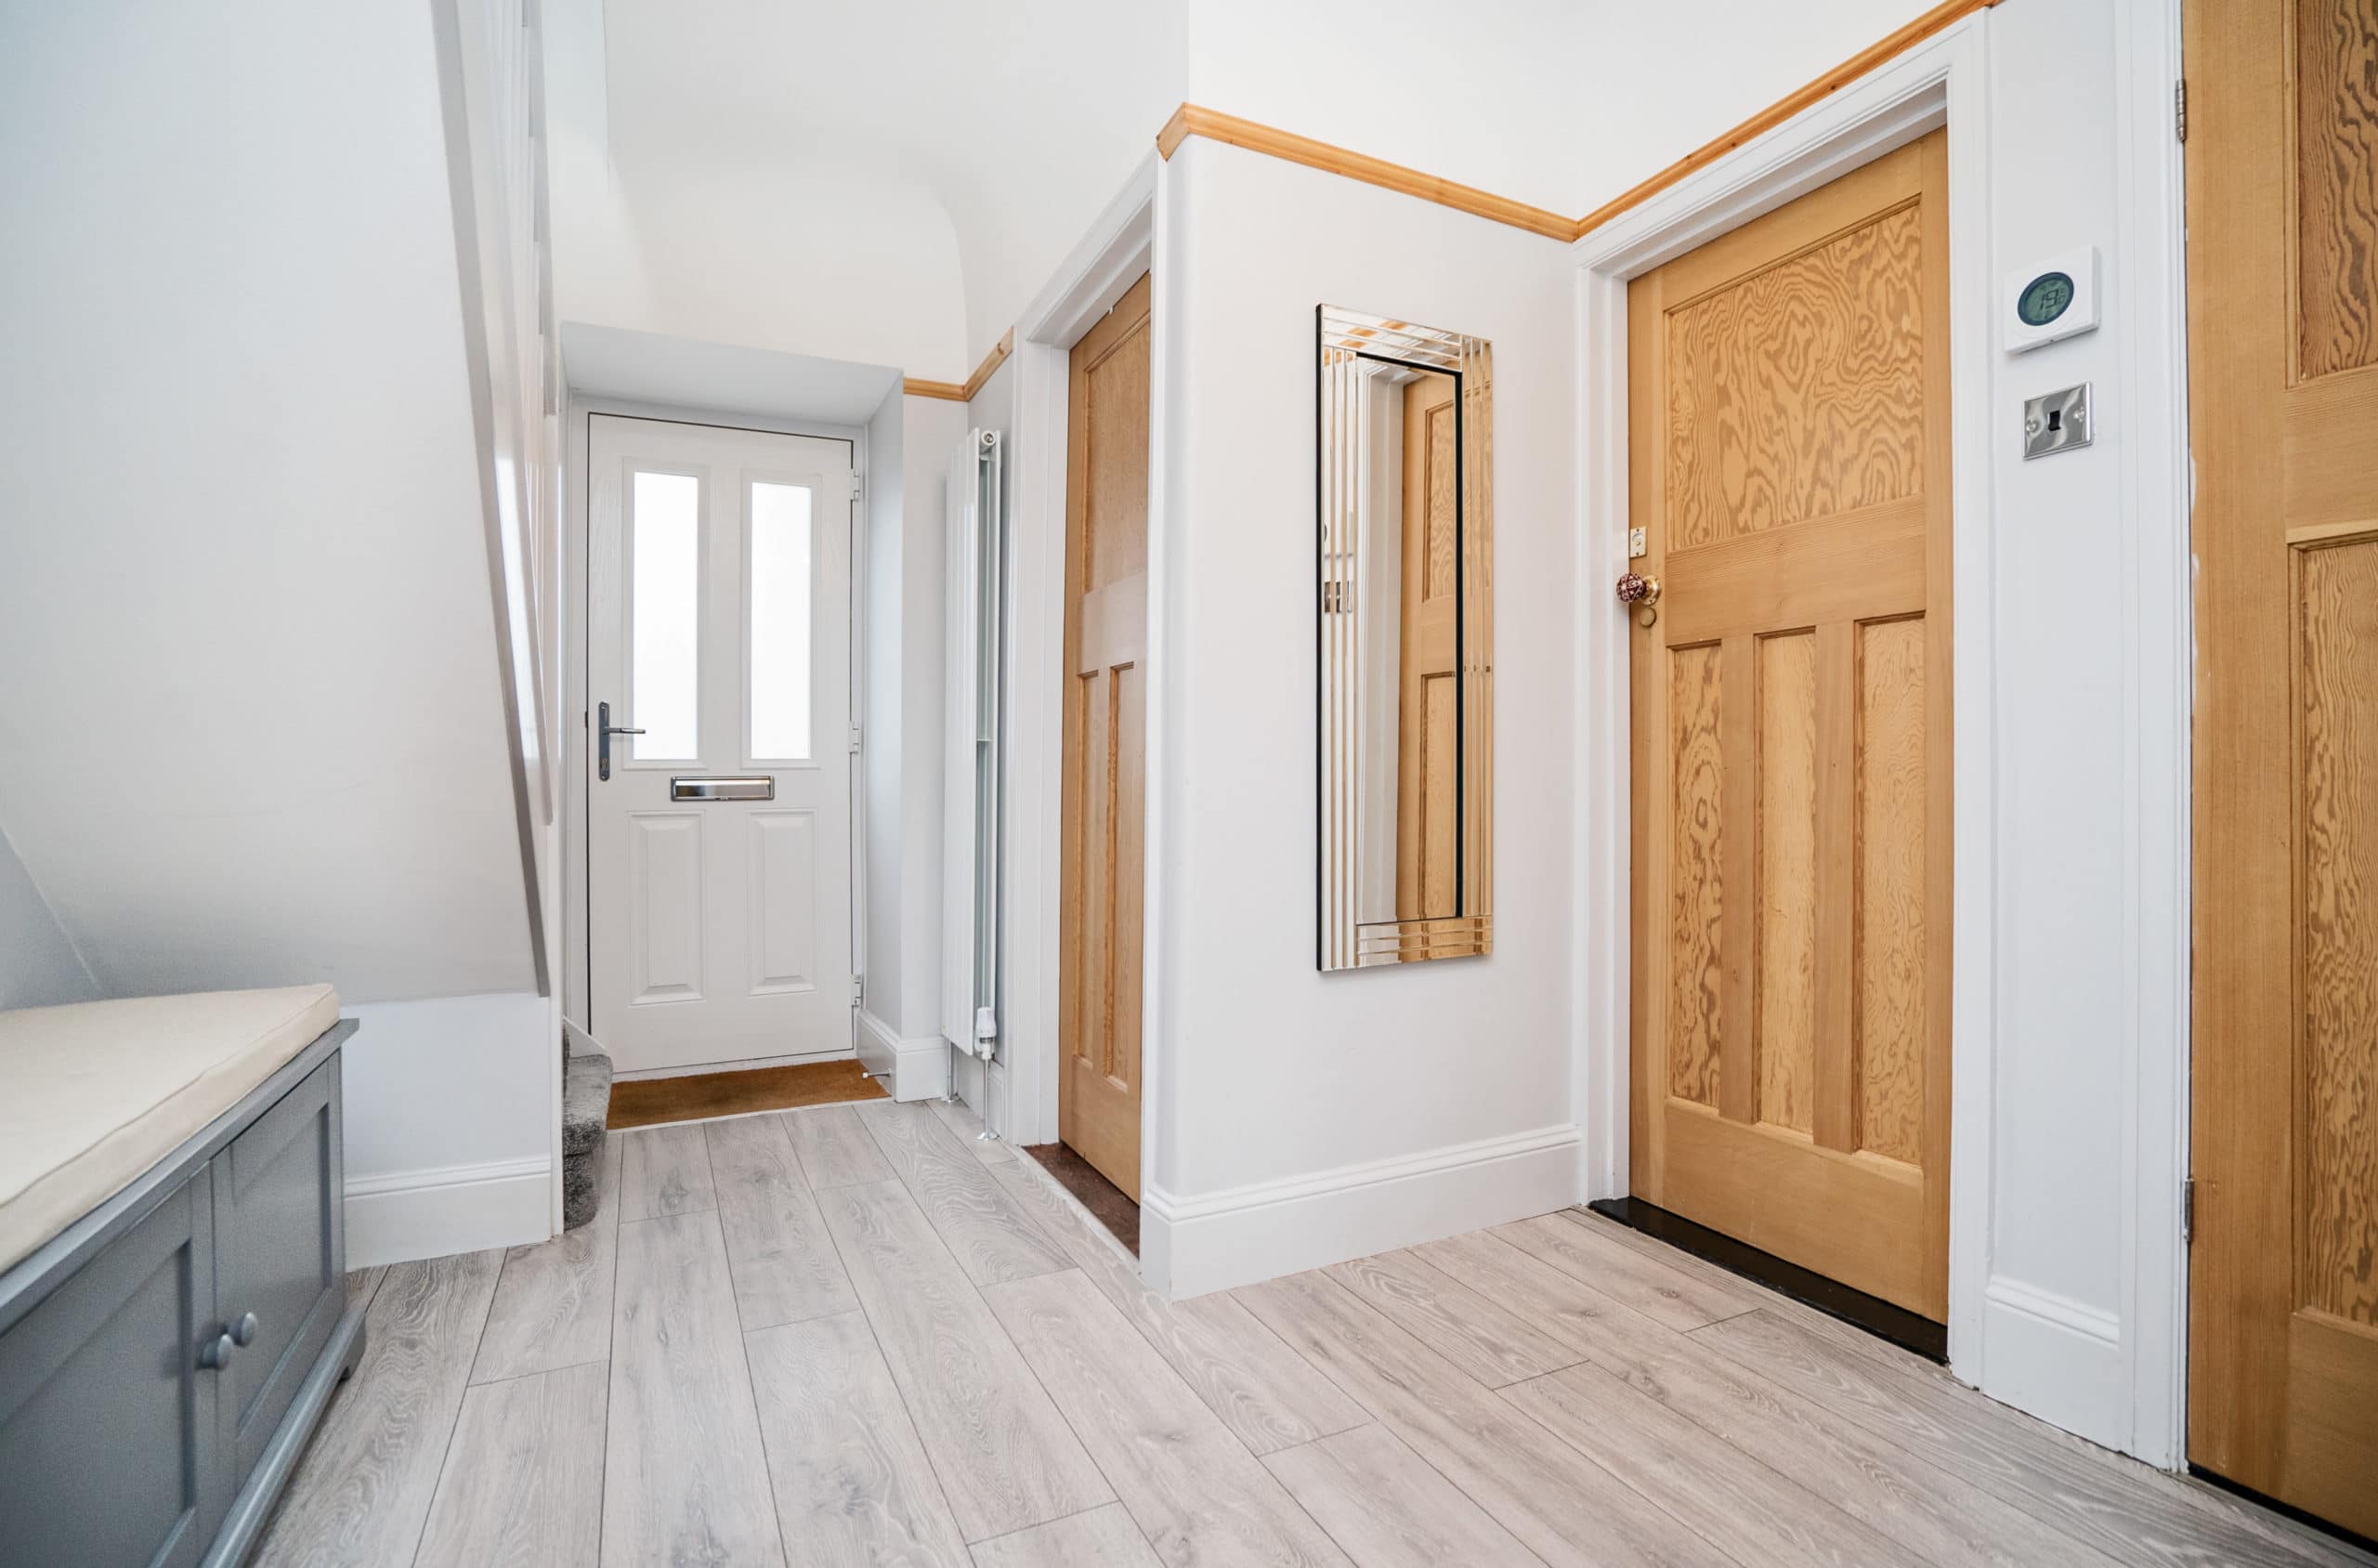
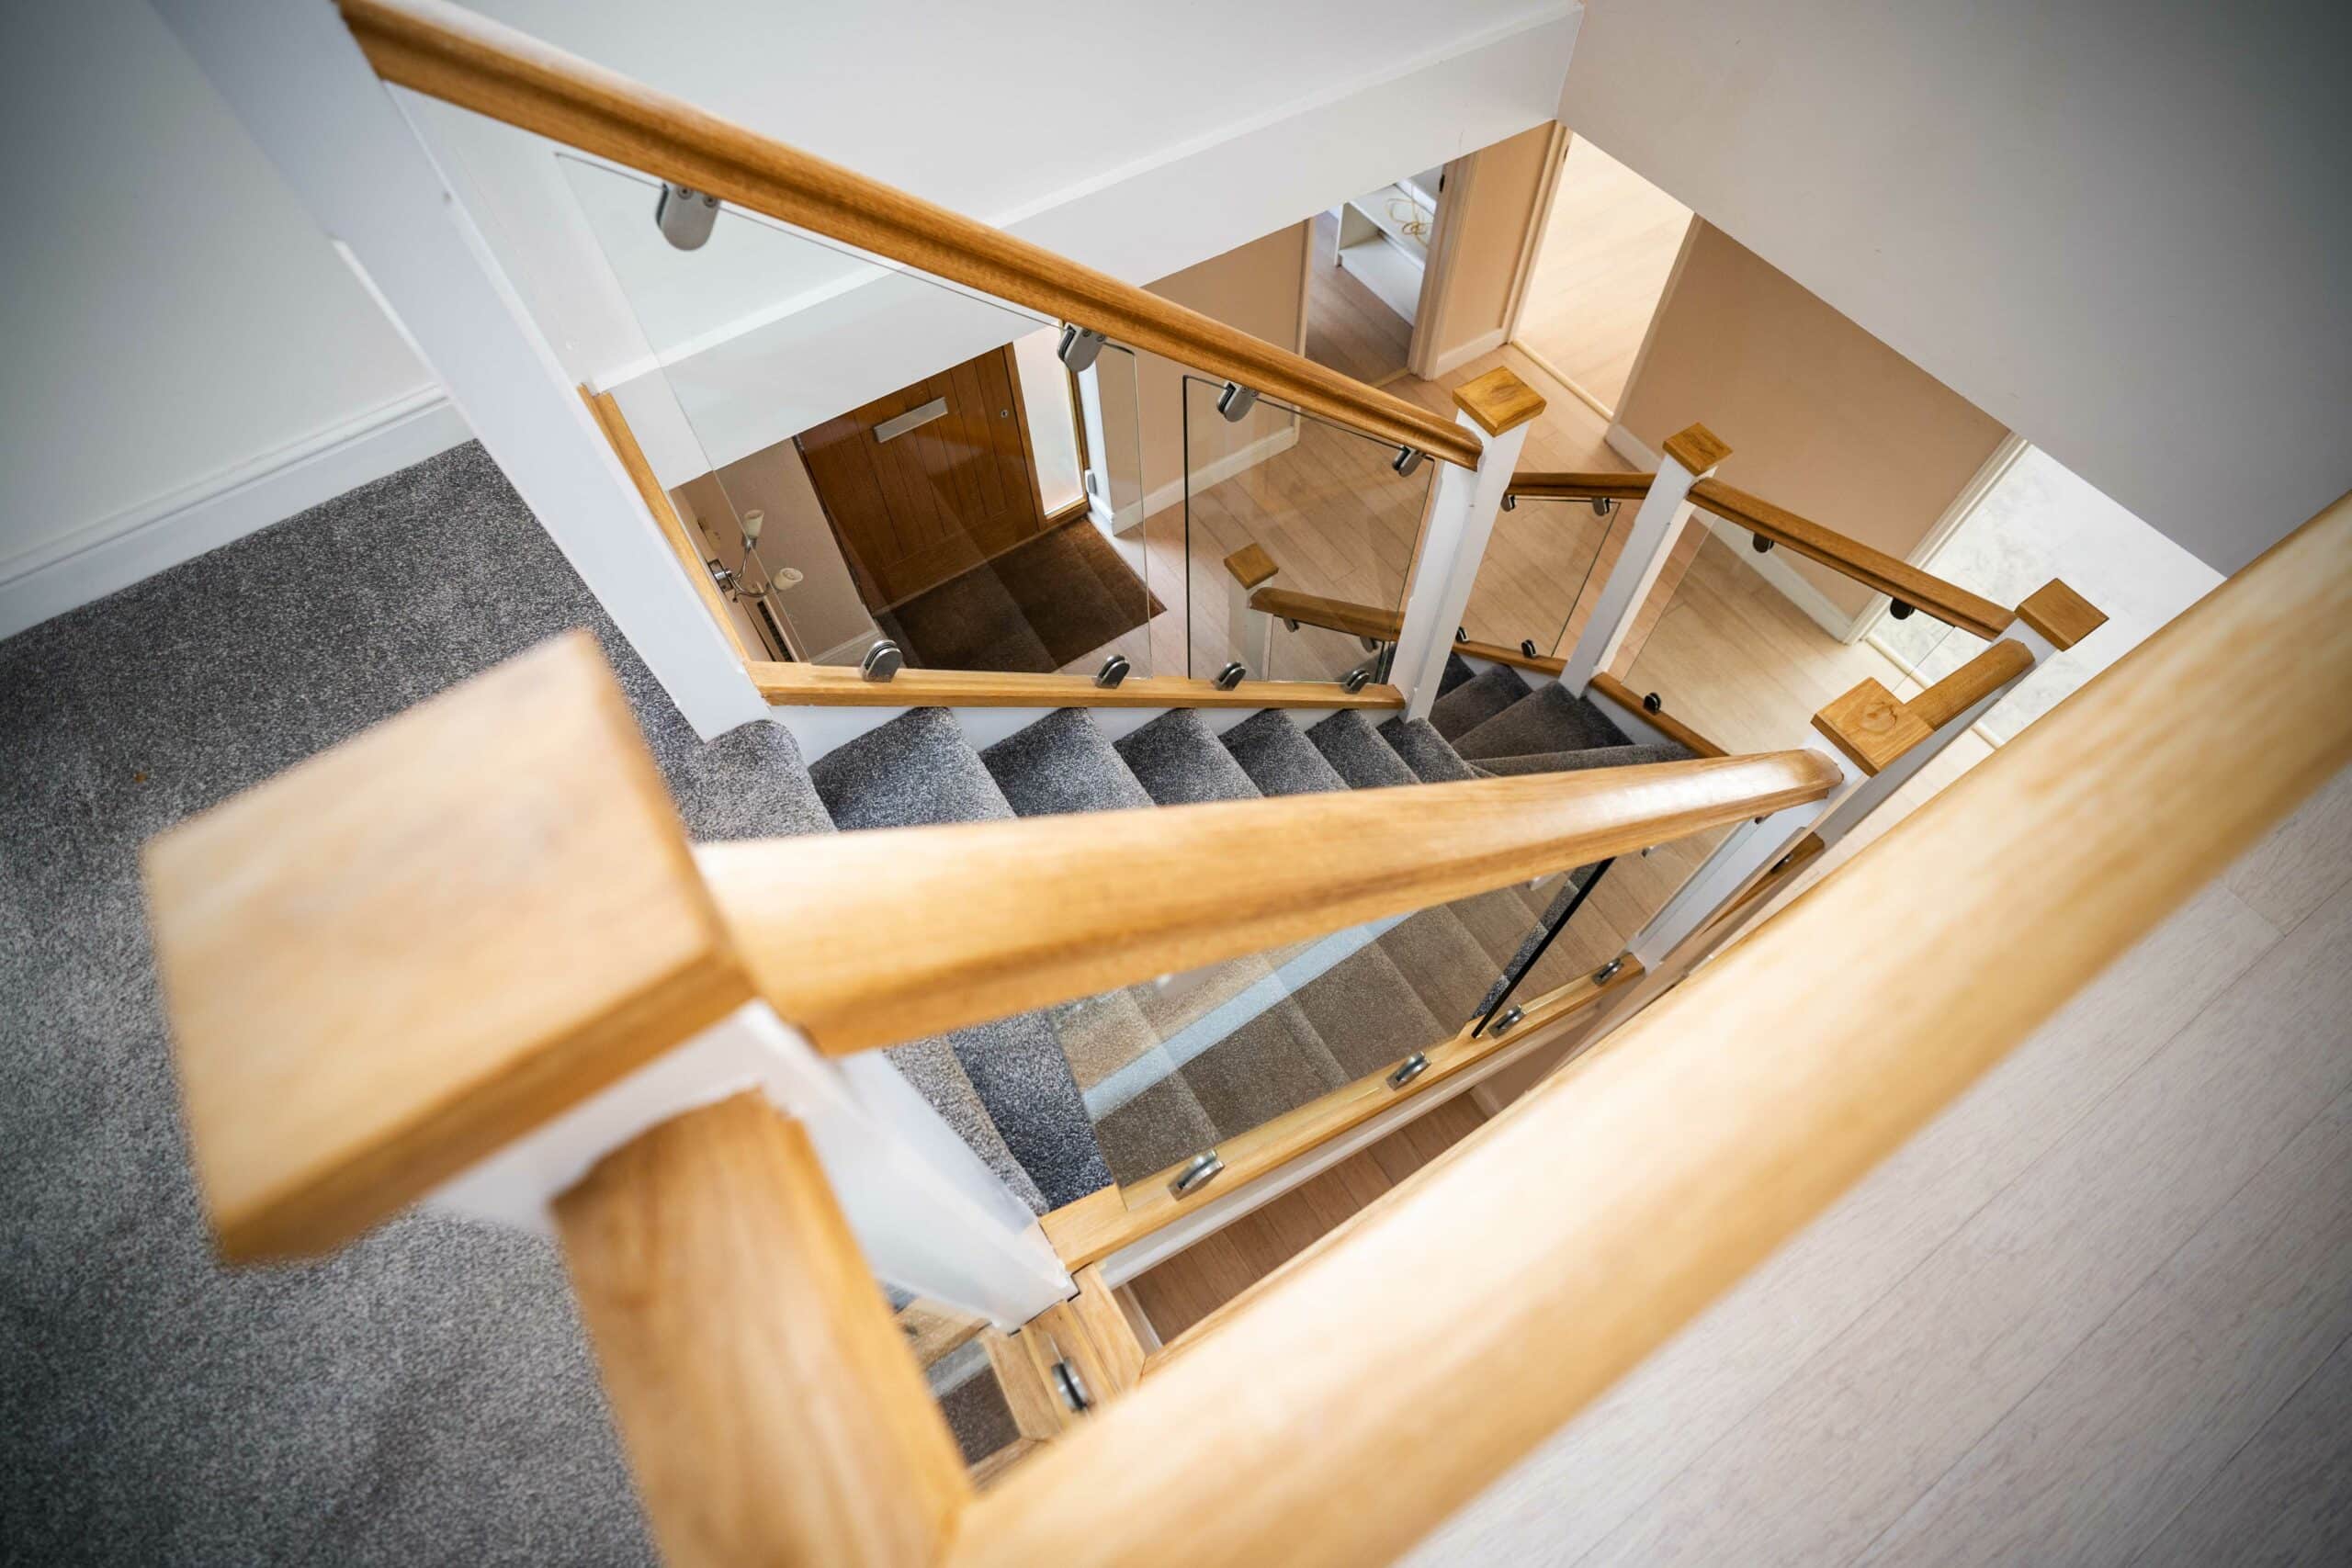
The hallway is often the first thing you see when you walk in the front door, and a nice one can really make a house far more inviting and spacious. Hallways and landings often seem to be omitted from property particulars. Sometimes that’s fine, but if it’s a feature of the house or there’s an impressive staircase you definitely don’t want to miss it out!
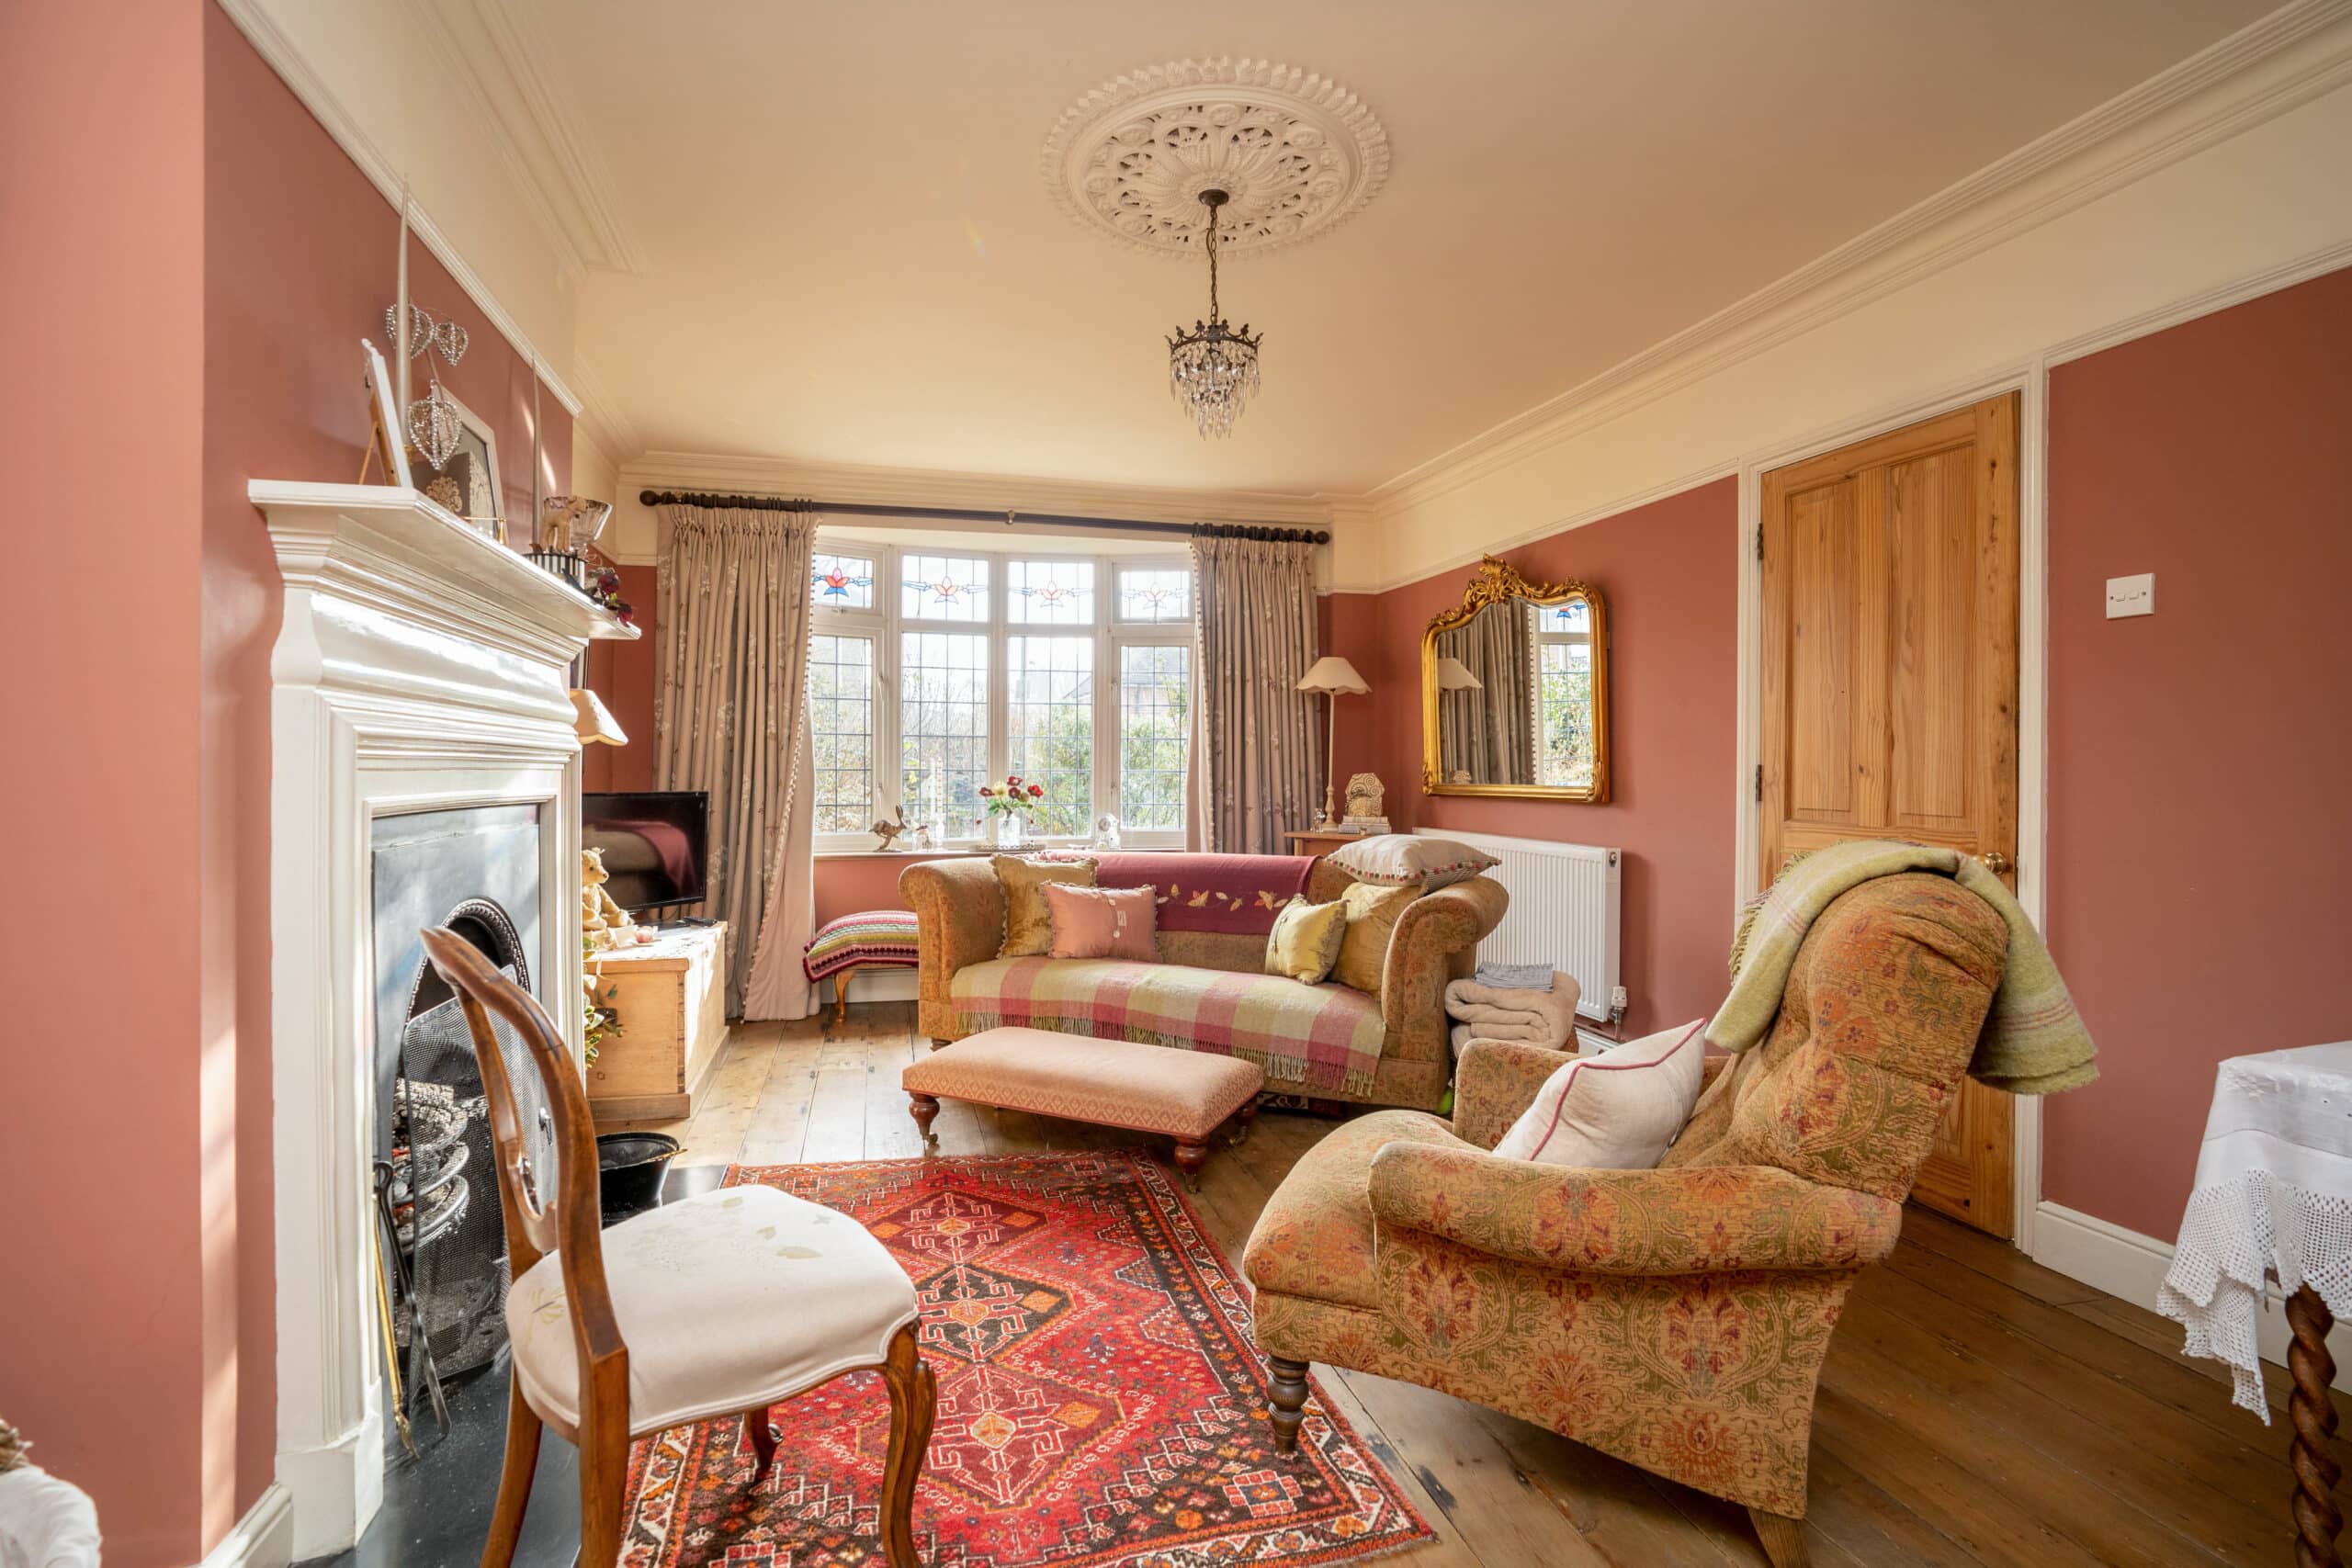
3. think about what you can't see
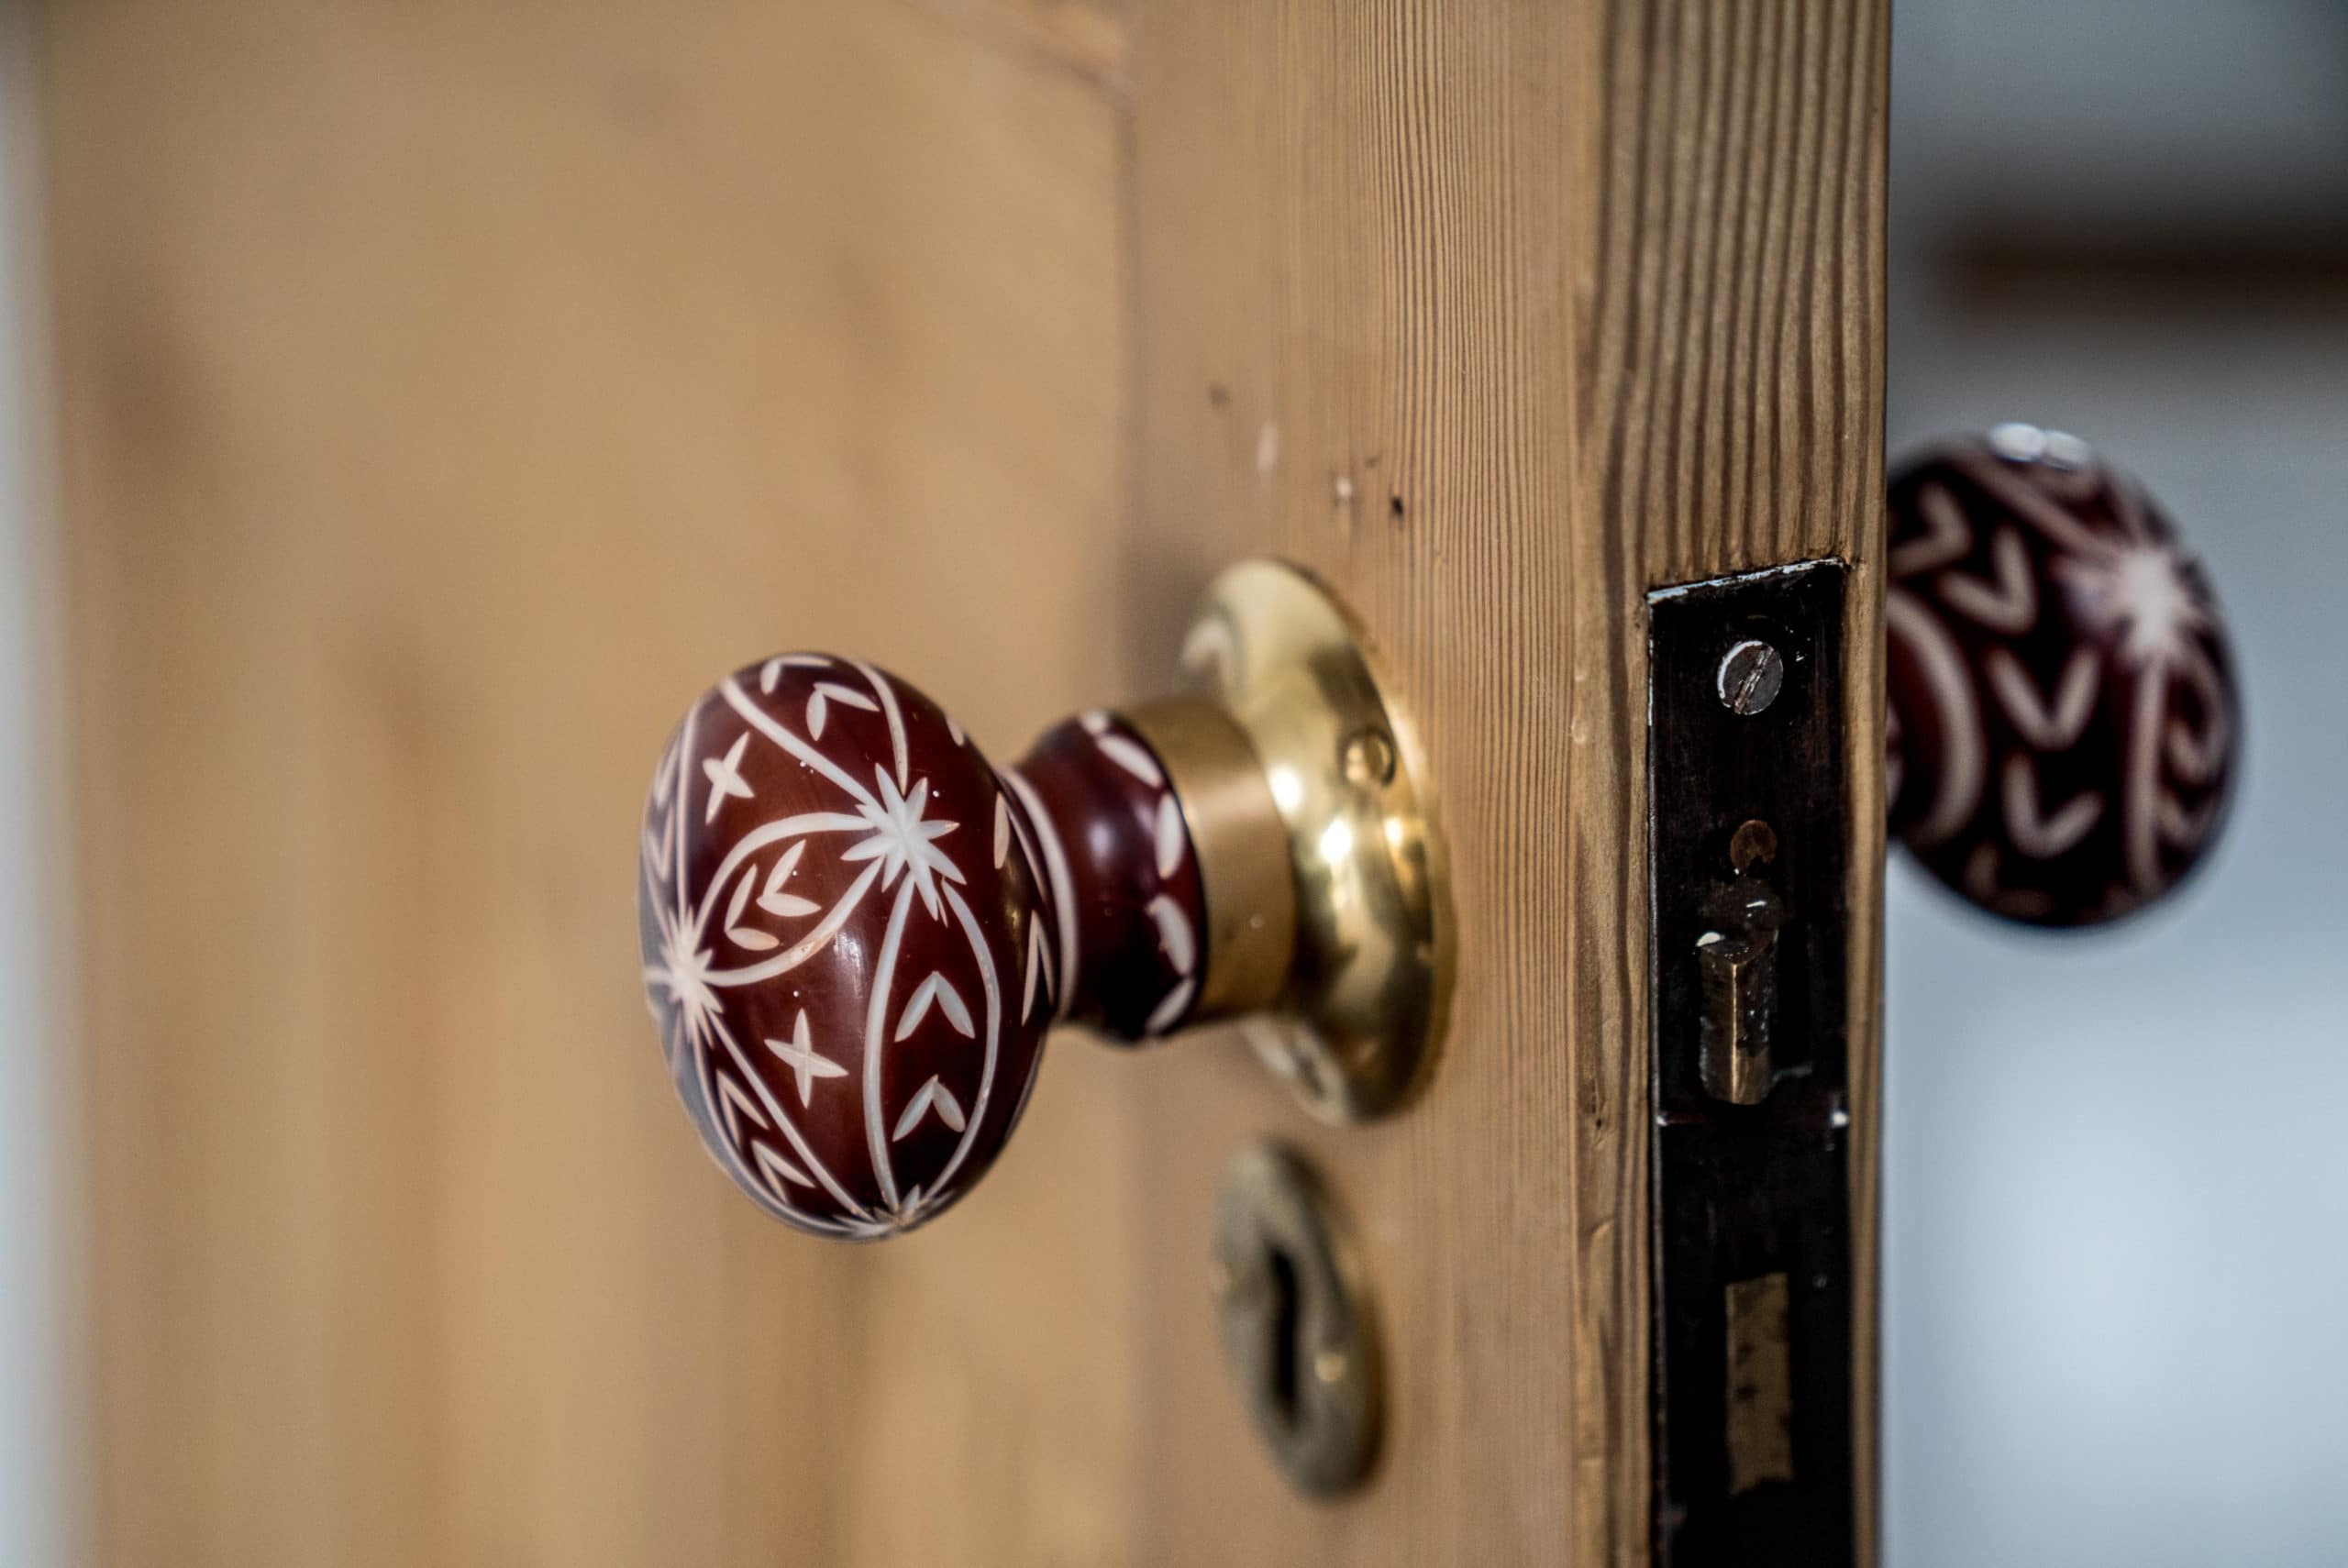
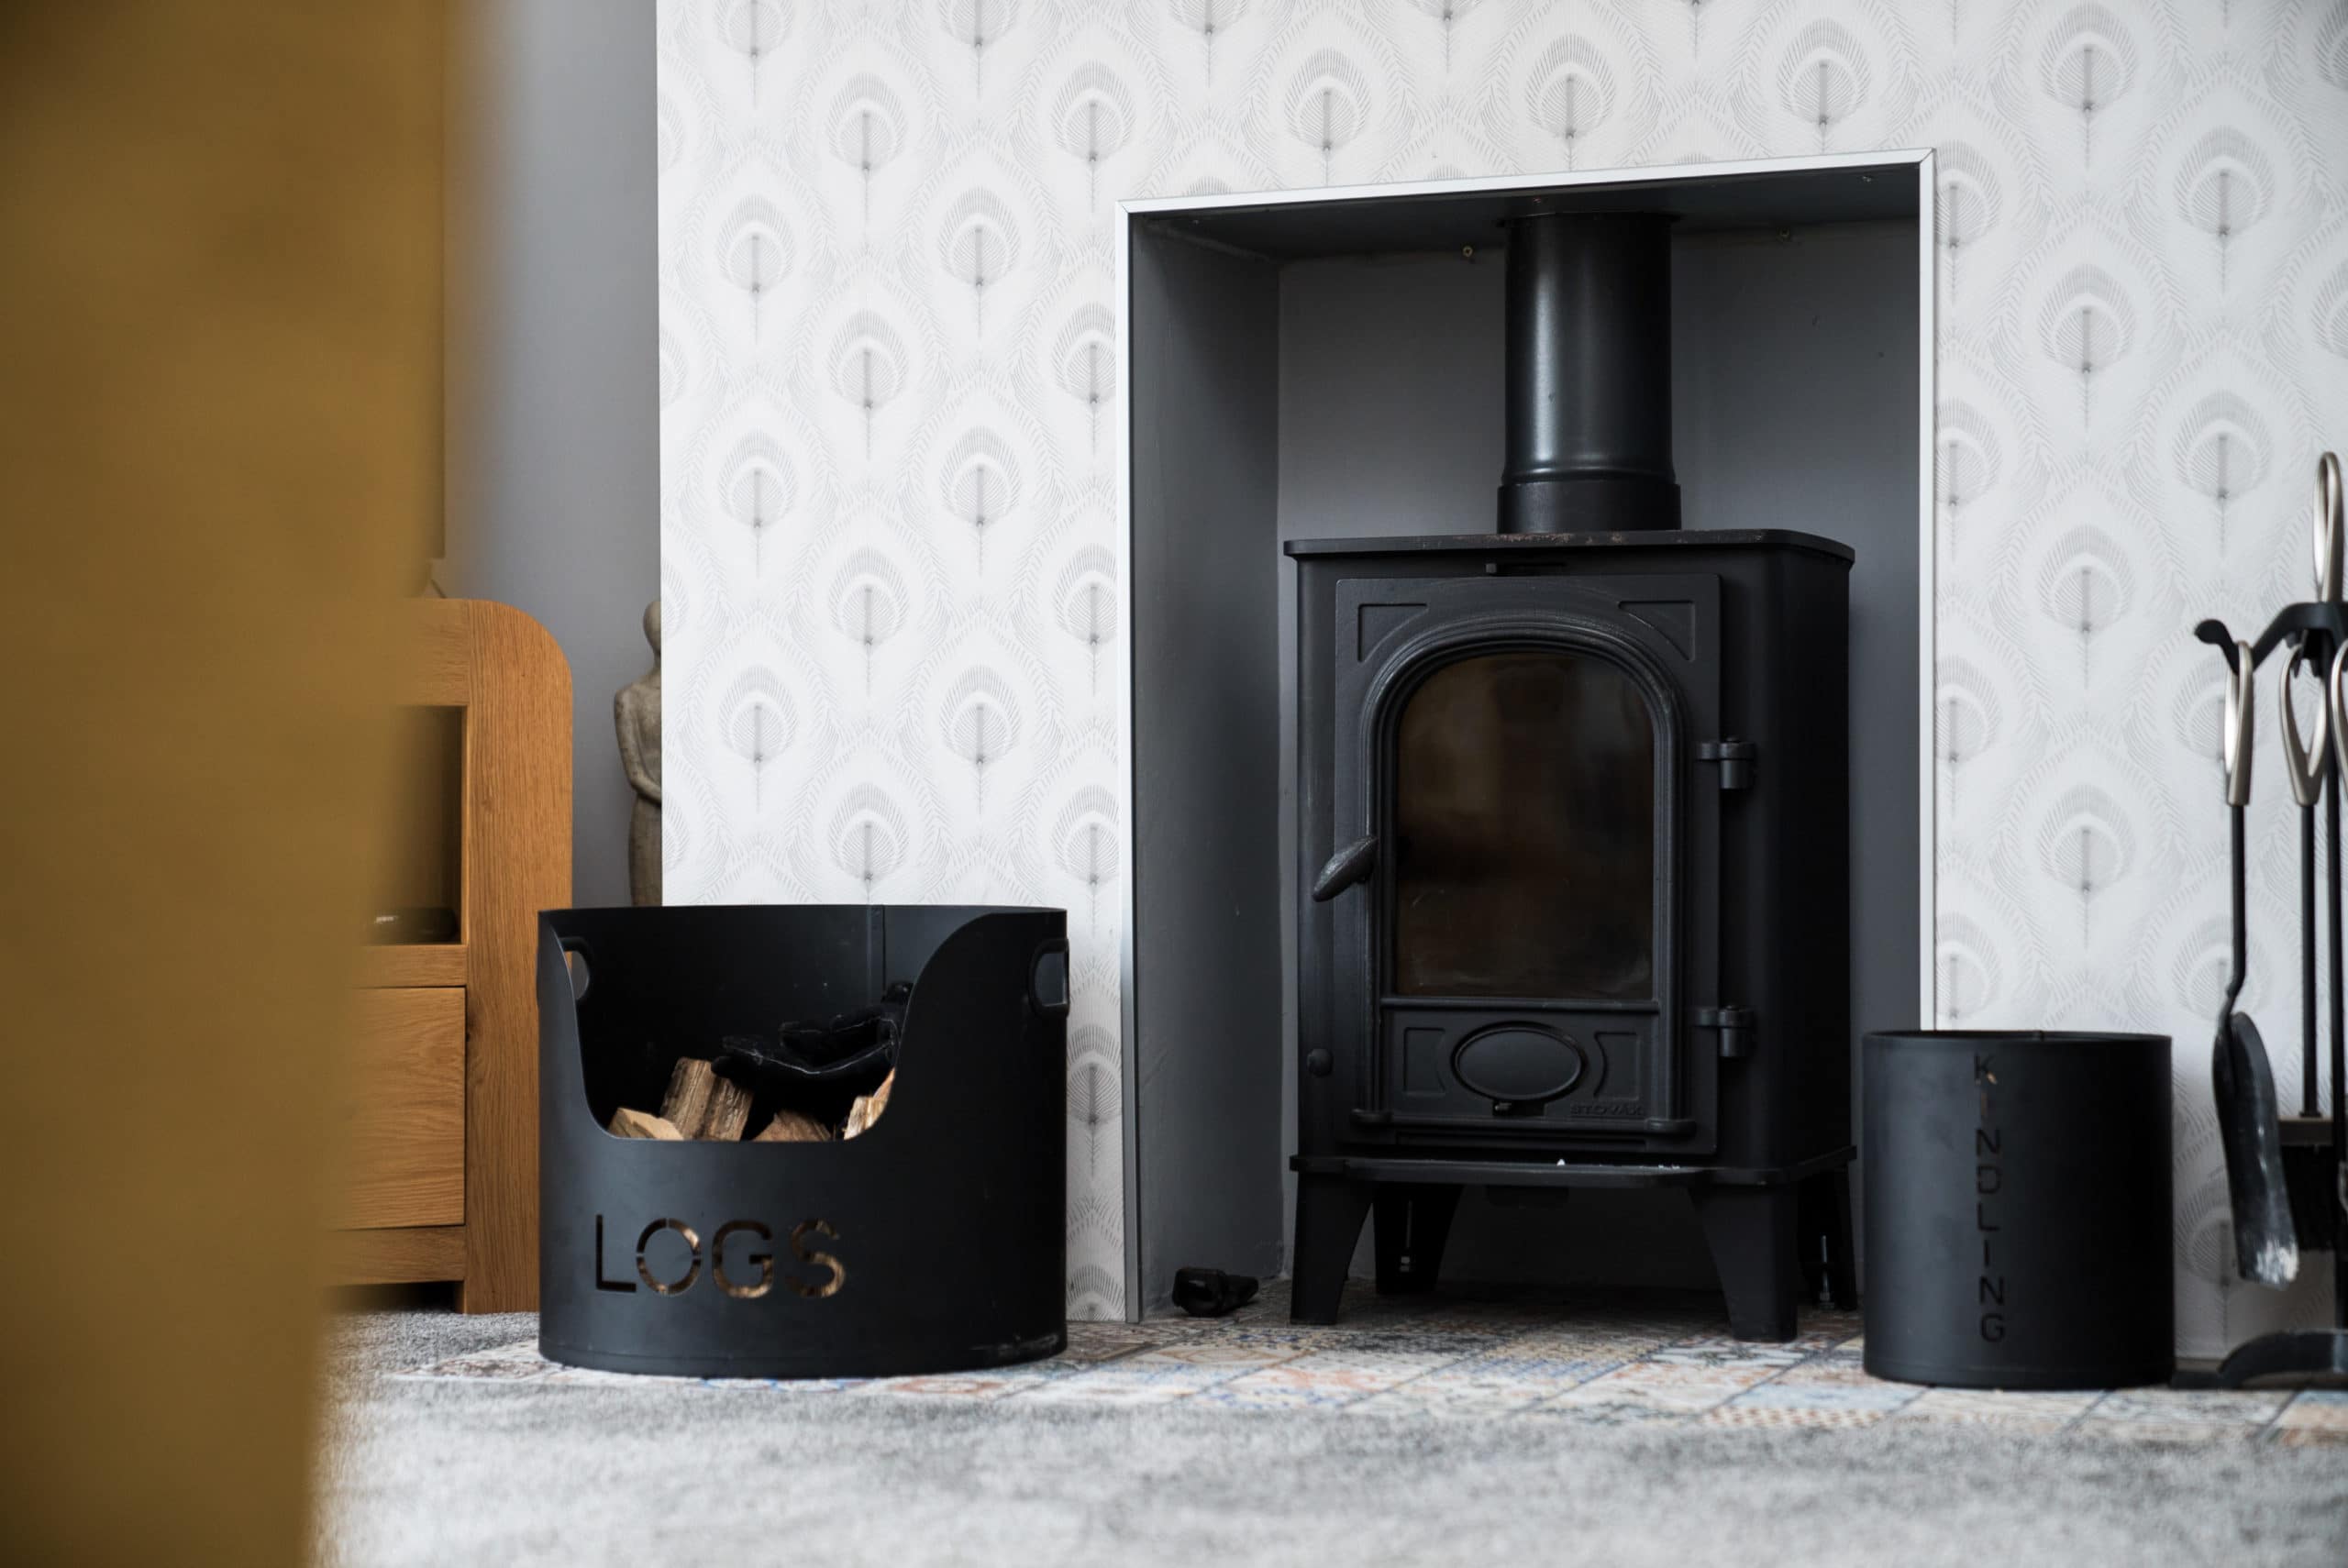
When photos are uploaded to property websites, the quality is downgraded to make the pages load quickly for people on mobile devices or slow connections. Why’s this relevant? Well, it means that you can’t zoom in and things further away from the camera can’t be clearly seen, especially for people who are looking at the small screen on their phone.
If you have a wood burner, feature doors, impressive lights and other nice touches such as light switches or monkey tail windows handles, you should make a point of showing these. They may not be easily seen in the main photos of the rooms. As we’ve said already, buyers don’t always read the text so just mentioning them isn’t really enough.
2. get the outside photos right
Before your house goes on the market take some time to make sure the front looks as smart as possible. Cut your lawn and hedges. Weed your driveway and perhaps even go over it with a pressure washer. Wipe down your window frames and window sills.
On the day, take your cars off the driveway before the agent or photographer arrives as this will save time. Move the wheelie bins into your garage or down the side path. If neither of these are an option, the bins can be moved out onto the road for a few moments whilst the photos are taken.
Usually agents and photographers will shoot most of the inside photos with a 16mm wide angle lens. However, for the outside photos it can often be beneficial to stand slightly back from the house and zoom in. Standing close with a wide angle lens can give a slightly strange photo looking up at the house. Much like the interior photos, you should aim to keep your uprights vertical.
Furthermore, you can make the photo even better by getting the camera up into the air as with the above examples. If you don’t have an extending pole, a tripod with it’s legs folded into but extended can be held above your head. Set the camera to a 10 second self timer and then you don’t have to worry about buying a remote trigger!
1. get rid of the clutter!
We’re sorry if you were hoping the number 1 spot would be something you haven’t heard before! The conventional wisdom of de-cluttering your house really is the best way.
Get yourself some boxes and move the things you don’t need into the loft, garage, or self storage. After all, it’s going to need packing up when you move anyway! Have another look at the photos on this page for an idea of how much ‘stuff’ you should ideally have out.
Not only will your house look better and be easier to keep clean for viewings, there’s another reason too. In houses where there really is a large amount of stuff, buyers become concerned about how the seller is going to manage to get everything out. These concerns are often greater if the seller is trying to downsize to a smaller property. Buyers start to ask if the seller will even go through with it when they realise they can’t take everything with them.
So there we go, the classic advice really is the best!